Monday, November 4, 2013

Rosie Revere, Engineer - Review

A few weeks ago we were browsing our local bookstore. While J was busy reading Curious George, I found this new book, Rosie Revere, Engineer (affiliate link). It caught my attention mainly because there is engineering paper on the cover! I picked it up and couldn't put it down. I even cried! It's now part of our picture book collection.

It starts with an introduction of a shy little girl who collects trash and recyclables (someone after my own heart!). She builds innovative contraptions for relatives, but they don't always turn out as planned. Her Great Great Aunt Rose (aka "Rosie the Riveter") gives her some sound advice about not giving up though her design didn't turn out (this is what had me in tears - sometimes we put our heart and soul into something and it fails, which sucks).

It was fun that this book makes a historical connection and has a great flow/rhyming rhythm. I recently read it aloud to J, who immediately wanted to find his book about building Handcrafted Playgrounds (from 1975, gifted to us by a dear friend) and start to design and build his own things (aka engineering). He was also pretty interested in the historical afterward the book provides about women in WWII and asked some questions about that (luckily, I am pretty fond of history too).

All in all, I love the message of the book that it's ok that your designs don't work right the first time, just as long as you don't give up trying. I'm also all for strong female engineering characters. I highly recommend this book as an addition to your nerdy library.


Disclaimer: I purchased Rosie Revere, Engineer, and opinions expressed in this review are my own.

Saturday, November 2, 2013

Does it dissolve?

We subscribed to the Magic School Bus Science Club when I found a half off coupon (making each kit ~$10/mo). J is a little young for the intended age group, but many of the experiments he can do with guidance. He gets so excited when he sees the Magic School Bus package on the doorstep. We usually do an experiment the following weekend (though we haven't done more than 1-2 before the next month arrives - they are saved for later use of course).

This month's experiment packet was on water. The experiment that we chose was Substances Dissolving in Water. We used their recommended mixtures and added another (see details of the experiment below). We also didn't use test tubes standing up in clay, as they recommended. Instead, we used custard bowls and mixed the substances with clean spoons.


Materials:
*6 custard dishes filled half way with water
*vegetable oil
*food coloring
*salt
*sugar
*sand

Hypotheses:
*Guess whether the material will dissolve (go away) when combined with water. A good way to think of it would be: can you separate out the material to get just water + material after you combined them? If you can't the material dissolved.

J's Hypotheses: Does the material dissolve?
*Water and oil: Yes
*Water and salt: No
*Water and sand: No
*Water and food coloring: Yes
*Water and sugar: Yes

Directions:
*Add a few drops of oil to one cup and stir.
*Add a few drops of food coloring to one cup and stir.
*Add a teaspoon of salt to one cup and stir.
*Add a teaspoon of sugar to one cup and stir.
*Add a teaspoon of sand to one cup and stir.
*Observe your matter. Did each one dissolve in water?
*Record your observations.

Results:
*Water and oil: No
*Water and salt: Yes
*Water and sand: No
*Water and food coloring: Yes
*Water and sugar: Yes

Oil at the top, water below (not dissolved)
J loved this simple science experiment. His hypotheses were all over the place, but now if he does this experiment in school, he'll know which material dissolves in water.

I can't wait to try other experiments from the Magic School Bus.

Monday, October 21, 2013

Melting Ice and Colors!

I've seen this activity a few places, but this ice and color lesson caught my attention on Pinterest last year.

I thought I'd share our experience with melting ice and colors and how we conducted the experiment. J had a great time, and he really directed the lesson. I was happy with how it turned out!

We tried to fill the ice cube trays with primary colors (red, blue, yellow) food coloring and then added the water, and it was a disaster. I rinsed out and started over. We filled our ice cube tray 1/2 full of water (to give us a little wiggle room putting into the freezer) and then added the primary food coloring drops (4 drops per cube). We stirred each color with its own spoon (so we didn't cross contaminate colors before we even started our experiment).


We froze the ice and then placed them into clear custard bowls. We put two ice cubes in each dish, making sure each of the colors mixed (yellow/blue, red/blue, red/yellow). J predicted/hypothesized what was going to happen in terms of colors using little note cards in front of each dish, using markers for his predictions of colors.


I particularly like the yellow, which didn't show up in the wide shot above (see close-up below). I also liked the purple heart and the orange pumpkin.


Now, let me warn you that cheap food coloring is hard to wash off of hands. Both J and I were dyed for a day or two (surprisingly, the clothes remained unscathed):


We let the ice sit through naptime and brought out the paint brushes to see if his hypotheses were correct. He was spot on with his predictions:


Now, J was thinking like a true scientist, "What if..." He wanted to know what would happen if he mixed all of the colors. He tried dipping his brush into all the colors and then painting, but that would just end up the color of the last color he dipped in. Grandma suggested doing dots of each color and spreading them around:


It made brown! However, J wasn't super satisfied or convinced. He wanted to combine all the colors into one big bowl.


He painted with it, and he ended up at the same solution: brown (see brown line above the red line, below)


I loved making this experiment our own, how simple it was, and how excited J got about experimentation.

Sunday, October 13, 2013

Why I've been slacking


Time to announce why I've been feeling so bad for the last few months. I'm hoping to have some more energy soon. We're all excited.

Sunday, October 6, 2013

Melting Ice

Objectives:
*Measuring temperature
*Phases of water
*Hypothesis formation

Background:
J wanted to do science, and I have been a slacker the last few weeks/months. I wanted to see how well J did with reading a thermometer and making hypotheses (educated guesses), so I put together a melting ice science project on the fly. We even put it in J's Science Lab Notebook.

Methods and Materials:

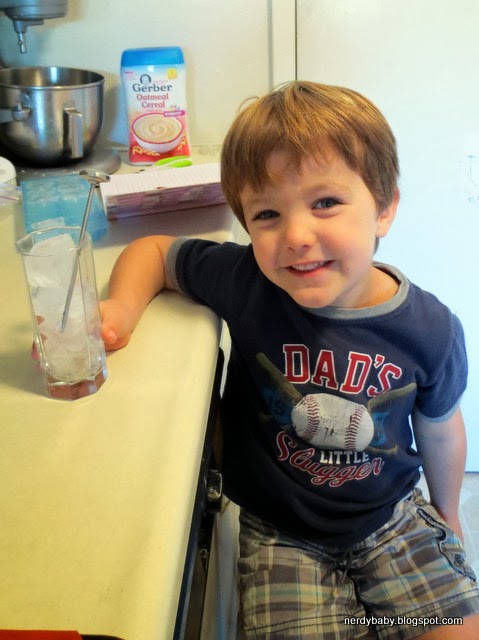
Basically this project consists of  filling a clear glass full of ice and taking the temperature throughout the day as it melts.


Hypthesis formation:

I asked J, "What will happen to the ice?"
-He replied, "The ice will met to water."

I then asked, "How much water will be in the glass?"
-He stated, "To the top of the glass!"

Taking the measurements:

We set up the experiment and ran a few errands and took naps. I'm pretty sure we have a digital thermometer, but analog is more fun. J was able to tell what numbers the thermometer read (at least to the nearest 10).

10:35a: 20 deg F
11:00a: 30 deg F - ice is beginning to melt
1:00p: 32 deg F - ice is 1/2 way melted
3:00p: 60 deg F - ice is melted
5:45p: 70 deg F - water is now room temperature.


Note, the ice melted to water and the glass was half full (or half empty?). Volumetrically, ice takes up more space than water, which is why when you don't get free refills on your drink, you want less ice so you end up with more liquid.

J was pretty disappointed that he guessed wrong, but I told him that's ok. It's why we experiment, so we can learn more. Next time he'll know the answer. He was pretty excited for this impromptu science lesson.

Stay tuned for our colored ice cube experiment which we set up yesterday to do sometime soon.