Showing posts with label biology. Show all posts

Friday, September 8, 2017

How do Animals Help Seeds Travel?

Guest post by Jennifer from Education.com


In this fun educational project, children discover firsthand how animals can help distribute seeds in order to spread them across the land.


Many plants grow from seeds – their seeds are like baby plants. Seeds move around; that’s how plants start growing in new places. How do seeds move? Do mama trees push their seeds in dirt strollers? Of course not! One way seeds travel is by catching rides on animals: a seed in one place gets stuck to an animal’s fur, the animal moves, and then the seed falls off in another place. The animals help DISTRIBUTE the seeds.


Experiment Questions:
  • Did you catch any seeds by acting like animals in your yard (or playground or park or nature area)?
  • Did some fur catch more seeds than others?
  • Did different kinds of fur catch different kinds of seeds?
  • Did some seeds stick to fur better than other seeds?
  • What about the seeds helped them to stick?


What You Need:
  • Socks
  • Scraps of fake fur in different textures
  • Glue
  • An outdoor area with lots of plants


What You Do:
  1. Glue the scraps of fur onto the old socks.
  2. After the glue dries, pull the socks on over your shoes.
  3. Go play outside in your yard or playground or park or nature area.
  4. If there are more kinds of socks than kids, change socks now and then to give all the socks a try.
  5. At the end of your play, remove the socks and examine them carefully. Think about the research questions above.
  6. Talk about the plants and animals you have in your outdoor areas and how you think they help one another.

------

Jess Note:

I  think my three year old would love to play pretend and be an animal carrying seeds around. I can't wait to try out the experiment though right now, everything around us is pretty brown and barren. I can see this being more effective during dandelion and prickly grasses(/high allergy) season. I'll circle back with how the lesson went at our house.

Saturday, May 16, 2015

Dolly Science

So, after Pi Day, my husband, John, came down with pneumonia for two weeks, we had Miss J's 1st birthday, and immediately after that, John came down with shingles (coincidentally, on the day Miss J was vaccinated against chicken pox and the day J's sixth birthday present of the chicken pox arrived on our doorstep). So needless-to-say, I've been working full time and mommying two (at times, sick) kids, basically on my own for two months. I'll admit that there have been days I've pooped out before 8p.

Background on the lesson:  I was able to save a few of my childhood dolls. Miss J has taken a particular liking to my Cabbage Patch doll, Meggie. She gets so excited any time we pull her out. Besides being a way to get her to stop evening screams, she is learning a lot. She took interest in this doll right around 7 months, and the bond has only grown stronger.


Science lessons learned by playing with a baby doll

  • Anatomy!! Ask about, describe, and point out parts of the doll's body. 
    • Miss J's favorites are the doll's nose, toes, and belly button.
      • Big bro, J, is joining in on the fun and knows that the belly button is where babies were attached to their mommies and how they received food while inside their mommies.
      • J likes to help her identify body parts and will even sing songs (ie. Head, Shoulders, Knees, and Toes, the Hokie Pokie, etc.) with her and the baby doll.
  • Have them teach: Babies like to show you what they have learned. Ask him/her to point to the body part on the baby doll, him/herself, and you.
  • Relationships and conclusions: Deciding what do do once you know a result is important. Ask your baby what to do if the baby doll is cold/tired/hungry/grumpy/happy/excited. How would the baby express if she is tired, happy, grumpy, etc.?
    • Miss J loves to cover her baby with a blankie, giving hugs, tickling the baby, cheering with baby, clapping the baby's hands, giving the baby a binkie, etc.
  • Order and direction: Science is full of order: you do this, then this, and then that (ie. put on bib, eat food, and clean up). 
    • In science, skipping steps can lead to bigger problems. Equate it to bathing your kid and then giving them that big giant bowl of chocolate pudding. Some things you just don't do out of order.
    • Show order while playing with the baby doll. See if your baby catches you doing something out of order or not what is expected. 
      • Do something silly like put the baby doll's shoes on before her socks. 
      • Of course, discuss it with your child! Communication is key in science.
  • Practice: Retention (remembering how to do something) is important in science, so practice skills!
    • Miss J loves putting bibs on Meggie and then pretend spoon feeding her.

Just in case anyone was wondering, Big bro, J, also played with a doll at an early age (no gender bias here):


What science lessons can you learn by having simple childhood toys around?

Wednesday, September 10, 2014

Card games for preschoolers

With the new baby, we've been spending a lot of time at home and encouraging quiet activities. Being from Vegas, I have more than my fair share of cards, but J recently received a Batman deck for his birthday, which increased his interest in card games. Here are a few of our favorites so far and the skills that they teach the players.


Go Fish!:
How to play: Shuffle the deck of cards. Each person gets 5 cards, and the rest of the cards go in a pile in the between the players. The players look at their cards (not showing their cards to opponents), and if they have any matches, the players put them face up in front of them. The players then take turns asking one another if they have a card that would match a card that is currently in their hands. If the person asked has the card, they forfeit (give) the card to the asker, and the asker gets to go again. If the person asked does not have the card, they say, "Go fish!" and the asker picks from the pile of cards in between them. We play a variation that if the person draws the card that they just asked for from the "Go fish!" pile and gets that match, they get to go again. We play until one player gets rid of all of his/her cards. Then we count everyone's matches, and the person with the most matches win!
Skills: Matching is important in science, especially biology with classification of species. Go Fish! also teaches the mathematical skill of strategy where the players have to listen and remember who asked for which cards. The players want the most matches.

War:
How to play: Shuffle the deck of cards. All of the cards get evenly distributed between the players (2-4). The cards are placed face down in a stack in front of each player. Nobody looks at their cards. Each player then holds their deck of cards face down and places the top card from their deck face up in the play area, in between the players. The player who drew the largest card gets the cards in that round (which the won cards go face down into a pile/stack in front of the player, when a player gets to the end of his/her deck, he/she picks up and shuffles the cards in front of him/her and resumes drawing his/her cards). If the largest card is a tie, the players go into "War" which requires the tied cards' players to place 3 cards face down (they put down 1 card per syllable while saying "I declare") and then one card face up (saying "war!"). The person with the largest face up card gets all of the cards that round. If it's tied again, repeat "War" until someone gets a larger card. All  number cards (2-10) have face value, and then the face cards are greater than number cards. The order of face cards are Jacks < Queens < Kings < Aces. Repeat the drawing/collection of cards/War until one player has all of the cards (the winner has all of the cards).
Skills: War teaches the mathematical skill of greater than/less than. This is a game of chance. It all depends on the cards the dealer gives whoever is playing. You aren't allowed to peak at your cards, so there's no strategy here. It would be nice if you get the higher, face value cards through wars, but you have no control over it.

Stay tuned for our "More Card Games" that we've taught J. They need a little more of a schematic description either via pictures or diagrams, and I'm not doing so well in the free time category at the moment.

Tuesday, July 29, 2014

Keeping critters out of gardens with a crop cage

A few months ago, I was 9 months pregnant, had just planted a garden, and then had a garden disaster where all of the leaves of our cucumber plants were chewed by a critter. The plants subsequently died. My husband took pity on me and purchased a few more cucumber plants and quickly built a crop cage out of PVC piping and leftover (affiliate link) >> protective netting << from last year.


The rectangular prism is PVC pipes cut to our custom dimensions (4 equal lengths for length, 4 equal lengths for width, 4 equal lengths for height), with eight 3-way elbows (our piping and fittings were spray painted to blend in with the netting). I recommend using PVC pipe glue to secure your structure (ours was made relatively quickly and was not glued in place, causing occasional frustration).

Each side was covered in protective netting held in place with zip-ties.

Originally, we were going to have a door that we could swing open for us to water and harvest, but there was a miscalculation on the amount of PVC pipe needed and ended up with a half door, which turned out better than anticipated, as I'll explain later. The door is 4 more PVC pipes cut to our custom dimensions (2 equal lengths for length and 2 equal lengths for height), with four 90 degree elbows. It was planned to be secured semi-loosely with zip-ties on one side and a string/latch on the other which would be used to open/close it. However, it's firmly zipped on both sides.

We were considering placing sand in the bottom PVC pipes, but my husband forgot to buy sand when he was purchasing material for the cage. We played it by ear and would have purchased some later, but it stood by itself and held up to some stronger wind gusts, probably due to the larger size. The cage was too big to remove and replace for watering every day (plus the plants eventually grew into it). However, it was lightweight enough for us to lift the sides for harvesting the hard to reach larger crops in the far corners. Some crops like the smaller strawberries and green beans could be pulled through the netting. You can also water through the netting if needed.

With a half door, we ended up not using the door at all. Instead, we draped the top section with the netting, which we moved up when we needed to water. The plants grew into the door, leaving it non-functional. The door is about hip height for me, which makes it hard to reach the stuff on the ground or beyond arm reach, but that's how I found out about the lifting of the cage to get the hard to reach stuffs. This complicated door design/access also could have deterred neighbors/strangers (we have our garden in a shared area), who, along with critters, we think were stealing some of our crops in previous years.

We were concerned about the netting and pollination of the plants. The netting was big enough to allow bees entry for pollination.

We ended up with so many cucumbers, tomatoes, strawberries, and green beans that we were able to enjoy many for ourselves and share with neighbors!

Plate of fresh regular and apple cucumbers

I highly recommend a crop cage if your garden is suffering from critter problems.

Do you have any hobbies you do and improve upon based on trial and error?

Friday, May 2, 2014

Do plants grow without leaves?

We recently had a rodent eat all of the leaves off of our cucumber plants:


My husband had high hopes that they would recover. I, on the other hand, was not so optimistic and asked that we buy some more and replant. (my hypotheses: the plants wouldn't survive)

We replanted, but we left the chewed plants for an experiment to see what would happen. We also had a cherry tomato plant that had its leaves only partially eaten. We let that one be without replanting.

The result?

A month later both chewed cucumber plants were completely dead.

Why?

Leaves play an essential role in the process of photosynthesis - the process plants use to convert sunlight into energy. I like to think of leaves as mini solar panels, using sunlight to make energy. Without leaves the plant has very little to create the energy needed for the plants to grow bigger.

What about the half-chewed tomato plant?

The tomato plant was only partially eaten by the rodent, meaning that the rodent left some parts of the leaves. The plant has recovered and is flourishing.

What experiment can you do at home?

You don't need a garden or bigger/expensive plants. Beans grow relatively fast from seeds. Plant 3 different beans in jars/cups. When they are big enough to have leaves, break all the leaves completely off of one, break the leaves half way off in one, and leave one to grow normally. Compare how they grow after that.

Personal lessons learned:

We made a crop cage for our garden before planting the new bunch of cucumbers. The new plants have not been targeted. We might blog about the crop cage in the future, but it needs a few tweaks first.

Tuesday, March 18, 2014

Garden Disaster

I guess this is our punishment for 80 degree weather in March. Something ate all of our cucumber leaves!!


This makes us all sad (J was on the verge of tears upon discovering this scene today). We'll wait a few days and see what the plants will do. I'm thinking we'd have to invest in new cucumber plants (it is early in the season)...or maybe steer clear of cucumbers this year. It was a hot item for creek rodents last year (I never saw what was eating our plants, but I have seen raccoon and squirrels in the neighborhood). We didn't need to net the plants this early before. The problem with netting/covers is that it doesn't allow for J to freely pick his produce. The netting was more annoying than anything else. The rodents chewed through it, and the cucumber plants grew through it.

I just bought a decoy owl and some Deer Off spray that should arrive by Thursday. We might have to still devise some sort of cage/cover. Sigh.

Any tips for garden disaster recovery?

Saturday, March 15, 2014

Gardening 2014

After a month of much needed rain (and we still need more to not see sky-high produce costs this summer), we've been blessed with sunshine and weather in the 70s - perfect gardening weather. Being almost 9 months pregnant, I debated planting a garden this year. It's hard to get up and down from the hard ground at this point and keeping another living thing alive during the summer might be overwhelming with a newborn. However, the motivating factors won: fresh homegrown produce that tastes better than what you can buy from the store and J's excitement for eating said produce. Plus, it wasn't going to be as big of an investment this year since we had made big planter purchases over the last two years.

Tackling concern #1, getting the garden started at almost 9 mo pregnant:

J is almost 5. He's become quite the helper and was super eager to help us with all steps off setting up the garden. This was probably our most successful garden shopping experience yet with him. He wanted to buy almost every sprout at the gardening store (because of our limited window space, we start most of our garden with store bought sprouts). We settled on lemon cucumbers, regular cucumbers, and cherry tomato plants, and we are germinating bell peppers and green beans. 

Here's J helping us plant the tomato plant:


He then staked the tomato plant since tomato plants like to have support to aid their growth.


Then he helped water all of the plants.


Our strawberries survived another winter and already have buds! This surprised us because we're in the middle of the worst drought in CA record keeping (and we basically ignored them all winter). This is 3 years in a row for our strawberry plants - definitely a great investment for us. I still love our strawberry planter (affiliate link).


We're trying cucumbers again this year. They were really successful last year, maybe even too successful because we saw how many cucumbers were growing, but they would disappear before we'd get to pick them (it was a hot summer last year and they are mainly water - the neighborhood critters got to them before we could). Going into gardening cucumbers last year, we didn't know/realize that they were a climbing plant, so this year, we spread them out a little more and gave them a cage to grow on. I hope keeping them off the ground will keep some of the critters away. We'll probably end up netting them again.


We just planted the green beans and bell pepper seeds. They are currently in terra cotta pots in our window sill. I'm hoping they'll sprout in time to get them in planters before the baby comes. If not, it'll be shortly thereafter.


As for concern #2, keeping other living things alive:

I think I can manage a garden, especially since I'm on maternity leave for a few months. The garden is right outside our apartment. If we had invested in a community garden plot, motivation to get out and about would be harder to find.


We're focusing on planting things that can be harvested all summer long. I love seeing J pull off green beans and strawberries, wash them with the garden hose, and pop them in his mouth. We haven't had good luck with our larger tomato plants, but we've done alright with cherry tomatoes in the ground in the past. I'm hoping we can do alright with this year's cherry tomatoes in a pot to give J the satisfaction of eating them all summer long.

If you have any tips to get the most from our plants, I'd love to hear them. How do you deal with critters? Ours are mammalian (raccoon and squirrels). How often do you replenish your soil? Do you use any plant food? Do your kids eat more veggies when they help in the growing process?

Monday, July 22, 2013

Curly Green Bean and Garden Update

I love the differences in nature.


Remember our garden? It was so great that the neighbor rodents were enjoying the cucumbers more than us! We would leave the cucumbers to get just a little bigger, and then they'd disappear overnight! The biggest ones were getting to be about half of the size of grocery cucumbers:


I was getting very frustrated. Right around the same time, MaryAnne at Mama Smiles posted about keeping animals away from your garden with pepper. I tried it, and we got a few more cucumbers, but these animals were relentless. I finally got frustrated enough to buy netting. We put it all around our planter and made a few holes, which we tied up with twisty ties (so we can access our produce easier). The sneaky animals have found a way to eat through the mesh, but we tied that up those holes too. The last two weeks, we've been having a lemon cucumber and a regular (almost store size) cucumber a night.


The animals don't like our green beans (they are missing out because they are awesome right off the vine - we're a raw veggie kind of family). They also haven't touched our green peppers. I'm thinking they like the cucumbers due to the water content. The cucumbers seem to go missing on very hot days.

In terms of other problems we've encountered in our garden:
1. Our leaves turned yellow: the internet says this can be caused by basically anything, like over watering, under watering, not enough nitrogen, not enough iron, disease, bugs, etc. We tried not watering and watering more with no change. We bought plant/vegetable food from the local hardware/garden store and fed our plants. They were looking much greener two days after the food, which included nitrogen. Our box of plant food says to feed every 7-14 days. We went 21 days since the last feed and decided to do it again since the leaves were yellowing.
2. Our cucumber leaves got crunchy and died: this seems to be part of the life cycle of the cucumber. This is different than the yellow colored leaves. We are still producing quite a bit of cucumbers, so I'm not worried.
3. We were afraid the green peppers in the back of our planter wouldn't get enough sunlight, but they are producing peppers now. Last year we tried the peppers in an upside down planter. We got 5-6 small peppers. They turned red while we were waiting for them to grow bigger. That's when we learned that red peppers are just ripened green peppers. This year's pepper plant grew much taller and so far has 3 peppers which are all larger in size than last year. It looks like more peppers are possible.

How is your garden growing? J usually gets first dibs at everything. It's so exciting to see him so willing to munch on a handful of green beans and offer beans and cucumbers to his neighborhood friends. We've introduced a few families to the wonderfulness of lemon cucumbers.

Monday, May 20, 2013

Our first homegrown cucumber!


Here's what it looked like in our garden on May 16:


We could have let it grow a little bigger, but we were anxious to try it! We ate half of it with our chicken sandwiches for dinner tonight. J wants to take the rest to his teachers and for him to eat at lunch time tomorrow. He's so proud of what he has helped to grow.

Side note: It's a good thing we like cucumbers since there are many more to come. This particular variety tastes like what is sold in grocery stores and doesn't have a bitter rind that I've tasted in some other homegrown cucumbers.

Thursday, May 16, 2013

Gardening with very little space

I feel that gardening is a very important way to get kids interested in what they eat. It's a good way to get them to try something new (most likely veggies!!). J gets first dibs at our garden harvest, washed of course with hose water, also from the garden.

Last year I posted about gardening with no space. We moved downstairs in our complex since that post and basically inherited a side yard that is getting a good amount of sun. With the move, we were able to purchase a planter.

We selected Patio Pickers Raised Garden Kit since it was a decent size and came with wheels. The wheels were an important feature as we wanted to move the planter for optimum sun (ie. on one side of the yard for morning sun and the other side for afternoon sun). I love the "cover" (think plastic trashbag + binder clips), which keeps the buggies and weeds out.

I think we didn't have good luck with in-ground gardens because our soil kind of sucked, the sun in the designated gardening spot wasn't great, and the animals, bugs, and weeds took over and got to the plants before we could. I'm also not sure if I watered correctly or not, which added to the stress. I really love the planter so far. We filled it with planting soil and planted our starter plants. We bought a green/red pepper plant, a regular cucumber plant, and a lemon cucumber plant. As much as I love homegrown tomatoes, I just don't have the desire to fail at tomatoes again (4 summers in a row). The watering system is super easy (just fill the cylinder until water starts dripping out the bottom hole).

Planted on March 23:


May 12 (note the overflowing cucumber plants):


We had 6 green bean (blue lake pole bean variety) plants and a sunflower that we grew from scratch. We gave the beans a tomato cage to grow up. Little did I know, our cucumber plants would take over the cage and climb as well. May 16, it just keeps getting bigger and bigger:


I'm a little worried our green pepper plant in the back won't get enough sun, but we'll have many, many cucumbers and green beans.

Our strawberries from last year survived the winter (barely), and that really excited me because I've heard from multiple sources that strawberries do better the second year.

March 23

May 12
Here's our biggest cucumber so far (May 16):


So far we've had 3 green beans and 2 strawberries - not too bad for mid-May. We have another strawberry that should be ready and some cucumbers that should be ready very soon.


Homegrown green beans are the best! I'm hoping for a big harvest so I get some too.

**We purchased our gardening materials at our local hardware store. All opinions in this post are mine.

Friday, March 8, 2013

An Awesome Review, Thanks Stroller Hikes

One day, when Nerdy Science was a baby (ie. Nerdy Baby), I was at the park with my son trying to get the wiggles out after school, before coming home for dinner. I ran into a friend and was telling her about this brand new blog adventure and how I was getting little sleep between setting it up and J waking up between 4-5a (it was pretty awful). I guess the passion for this science blog showed through my words (and maybe my baggy eyes). Another person playing with her daughter happened to overhear and told me about Stroller Hikes, a non-profit organization that encourages family outdoor activities together. She had done some web work for the group and put me in touch with the organizer. I was hoping to help write some of their science curricula, but it turned out that I went into hyper drive with the Pepsi Refresh campaign, then the grant, and now Science Saturdays (sorry, Stroller Hikes). They still have tons of information for parents about fun activities in the outdoors, including science activities. I highly suggest checking them out whether you are a Bay Area Local or not.

Since our Science Saturdays happen to take place in local parks, I decided to see if they would be interested in our science activities. They wrote a fantastic blurb about Nerdy Science's Science Saturdays on their website. I look forward to meeting more parents as the activities continue. If you would like to join in on the Science Saturday fun, please email me using the link to the left and I'll add you to our email list. Since we depend on weather and our family's health, we can only predict about 5 days in advance when the next Science Saturday will be. So far, April's activity is looking like April 20th or 27th. Stay tuned.

Wednesday, February 13, 2013

Sorting

J's been super excited to help out around the house, so I've been letting him sort the silverware (minus the knives) while I empty the dishwasher. To my surprise, he is good, and I don't have to redo. He is able to sort things by size and shape, a very scientific process. Think of how we label/name animals or plants; it's all one big sorting game. He's learning at 3.5 years old that he can classify objects by using knowledge he's gained from previous experiences, observation, and scientific reasoning - "This is a fork. It's not a knife. It's a big fork, not a little one." He's nailed the silverware; I think he's ready for classifying animals. They might be a little trickier.


Win for an unintended science lesson and getting items checked off of my to-do list around the house.

Sunday, February 3, 2013

Colored Celery Sticks

This colored celery experiment has been on my pinterest list for a long time. I finally decided to buy some celery, and we had some free time last weekend to try a 24 hr experiment. I also consulted this celery experiment for toddlers post our experiment to see their results.

Basic take home message:

Plants need water and use it during photosynthesis (plants need water and light to grow). We can see how the plants take in the water if we use colored water. It also turns the celery different, cool colors!

The experimental set-up:

We decided on 3 colors for the celery experiment: yellow, red, and blue. We filled the cups 3/4 full and used 4-5 drops per color.


J was a great helper.


We also at the last minute decided to add a control, which is something we can use to compare the other celery sticks to when the experiment is over. This celery stick had just water with no food coloring. We only had a small celery stick left at this point.


Hypothesis:

Big J and I asked J to guess what was going to happen. He had no idea why we colored the water, and his hypothesis had nothing to do with the colors. He did guess that the water was going to go down.

I thought that was a great hypothesis, and I wanted to make sure that J was able to see if he was right. You can barely see it in the beginning, but we used a dry erase marker on the cups to mark just above the water line (it's green on the yellow cup). The dry erase markers washed off in the end, in case you are worried.


Methods continued:

The experiment I pinned on pinterest ended up waiting 24 hrs, but we weren't seeing great results. We documented results at 24 hrs and 48 hrs.

Results, aka what happened:

At 24 hours we were able to see blue spots on the celery in blue water.


Our celery in red had a scratch on it. The scratch turned red and you could see the water leaking out, but there were no colors on the leaves at 24 hrs.


After 2 days (48 hrs), we extracted (took out) all of the celery sticks from the water. Here they are from left to right, no color, yellow, blue, red:


The control (no color) ended up looking healthier after 2 days. It was the smallest and weakest looking celery stick at the beginning. Yellow didn't really have anything to report on. You could see a little yellow in the celery veins leading up to the leaves, but there were no spots on the leaves.

Blue was our favorite. Here's a close-up of a leaf with blue spots and a blue vein behind it, so neat:


Red also gave us some interesting results. Here's a close-up of minor red spots:


And I (carefully) dissected the celery stick to get a better picture of the innards of the celery:


As for J's hypothesis:

All of the colors of water went down. J hypothesis was correct! We didn't compare which one went down more than others, maybe next time. Looking at the pictures from the experiment, there was no super visible difference between the three colors.


Note, that I took the celery out. The height of the water was slightly higher with the celery stick in it, but it was definitely visibly lower than the initial height of the water.

Potential problems with our experiment:

We didn't put the celery sticks in direct light (no space for it in our small apartment). Maybe if we repeat this experiment, I can clear out a space next to the windows.

For older kids:

Definitely don't forget the control. Preferably, your control will look like your other celery before you start. It would make for better comparisons when the experiment is over.

Dissect (cut apart) your results and document everything you see.

Repeat the experiment in different places. Try a dark closet, a window sill, and normal room lighting.

Try different plants. This site says carnations also work.

Wednesday, January 9, 2013

Why do we have brains?

This was the first question from my 3 year old this morning. My immediate answer (while I was getting ready for work) was, “Our brains help us do everything we want to do. Without your brain you wouldn’t be able to move, eat, speak, think, and lots more.” I of course then said, "We need to do all we can to protect our brains, so we can continue to move eat, speak, and think. If we injure our brains, we won't be able to do the things we want to do." In other words, I think helmet wearing is super important. J responded, "We wear helmets to protect our brains!"

Thinking about it from a biomedical engineering prospective (older kids/adults), our brains are the most amazing command center controlling our bodies! As we grow and learn, connections from one part of your brain to another are formed. Sometimes connections are easier than others (ie, when you are young, you can learn a foreign language better). Regions of the brains are responsible for different things, so if you injure specific regions of your brain, you might lose different abilities to do things.

On a personal note, I was 25 yrs old and experiencing some pretty persistent, bad migraines that were giving me "mass effects" like blurred vision and numbness. I was diagnosed with a defect called arteriovenus malformation (AVM) in my brain. It's where the veins and the arteries are directly connected, basically a useless vein since the oxygenated blood doesn't go through the capillaries to my tissues, just straight to the vein and back to my heart. Part of the problem is that the arteries are a high pressure system and veins are low pressure. The high to low pressure switch can cause eddies (turbulent flow), which can lead to the formation of aneurysms (where the artery wall balloons out) and bleeds. Talk about a scary diagnosis! Luckily (if there's something to be lucky about), it's a birth defect (so I've lived peacefully with it for a long time), it's gigantic and "diffuse" (5x5x5 cm), and I have inherently low blood pressure.

Here's a picture. You can see the AVM in both views here (look for asymmetry and squiggly lines). The AVM is in my left frontal and parietal lobes of my brain. 5x5x5 cm is a pretty large portion of the brain, and I've been declared neurologically normal, which to me is amazing proof of the adaptability of the human brain (and cardiovascular system too)...


Despite its quirkiness, I love my brain.

**Edited on 1/12/13 to add:
AVMs can be found anywhere in your body. AVMs in the brain are particularly scary since a problem there can lead to a very big problem. I think they are more common than we know. Many people live their lives with AVMs and don't even know they have it. I could have treatments to get rid of the AVM, but the risks of treatment outweigh the benefits since I do not have aneurysms.

Monday, November 26, 2012

Joshua Trees

Sorry for being MIA. We went on an impromptu trip to my favorite desert, the Mojave - yes, I'm biased. The trip was mainly for family, but I love the dusty scenery and seeing these fun shaped trees, the Joshua Trees.


We didn't get a chance to go to Joshua Tree National Park this time, but it's one of my favorites. It's one of those unique places where you can drive through two separate deserts and see the scenery change as you change elevation. I highly suggest visiting if you get the chance. However, you don't have to be at the national park to see Joshua Trees. They are all over the place down there.

I joke about my middle school, and because of their overcrowding, I ended up in Desert Discoveries (not by choice) as an elective. I actually remember a fair amount from 15+ yrs ago, especially when it comes to random facts about a place I love. As I we drove through the desert, Big J commented to Little J that Mommy could tell you all about those trees. The key is trying to keep it interesting for little minds. I highlighted its shape and how unique it is!

Joshua Trees:
  • Look like an upside down tree that has its roots in the air.
  • Are a plant UNIQUE to the Mojave desert! This is the only place in the world that they are naturally grown. The desert climate combined with the perfect elevation is the perfect recipe for these plants to grow.
  • Are related to the Yucca plant.
  • Many small critters make Joshua Trees their homes. It provides adequate shade/shelter in the hot, hot desert (it was 90+ in November!).
  • They do produce flowers, but need the cold to help them. It does get fairly chilly in the Mojave during the winter.
Stay tuned for our fun at The Living Desert and more random science bits about the desert.

Wednesday, November 14, 2012

Road Trip Science, AKA "I win!"

We've spent a lot of time in the car the past two months for last minute road trips (7-12 hrs each way). J is an awesome plane traveler, but we are definitely not a car ride family (bike commuters, holiday fliers, etc). In order to pass the time and keep down the whining, we came up with a brief "I spy" like game where we made up the rules as we went (nobody ever does that, right?).**

We weren't prepared ahead of time, so we didn't create a chart. If you are ahead of your game, feel free to create a chart with stickers of things you might see. You can have your kid circle or check mark what they see as they see it or place stickers on a paper as they see the animal/agricultural item. Being that we're approaching Thanksgiving, I figured I'd share our fun game.

Things we saw and talked about:
  • Animals on the side of the road (like cows in the field, not raccoons smashed on the pavement). The first one who spots the animal says the name of the animal and says, "I win!" With toddlers and preschoolers, recognizing animals in the distance is a good science lesson.
  • What sound does the animal make?
  • What does the animal eat?
  • How many did you see/could you count?
  • Did you see a baby animal? What's the baby animal called?
  • Why do we have these animals? Do we drink their milk or use milk for cheeses? Do we eat them for protein - this still might be abstract to little kids that steak/hamburger comes from cows? Does their fur/wool keep us warm (sheep/llamas)?
  • Spot the agriculture. "Hay! I win!" Guess what the trees/farms on the side of the road are. Talk about fruit and veggies in season and how fruits and veggies help our bodies grow big and strong (and keep us healthy).
  • Talk about mountains. The higher you climb the mountain, the easier it is for your body to get tired. Also, there's snow on the top of the mountain. It's colder up there than down where we're driving.
  • We have (well J has) an obsession with construction vehicles, so we had long conversations about what each truck does and why it's useful (even though we might be stuck going slowly for that stretch, ultimately, the road will be better).
  • Random statues are my favorite, but they aren't really science. I guess you can look at the structural properties and talk about how tall/wide or the colors, but by the time you realize what you saw, the likelihood your kid would still be excited is slim. We saw a dragon and a cow statue.

**Our way of making up the rules didn't cause contention since we only have one kid, and we were more concerned about keeping him occupied and not whining. I'm sure you'll have to modify the "I win" game with more than one kid, or have set rules.

Wednesday, September 26, 2012

Why do plants have roots?

My sweet boy and mother came home from a farmer's market with these sunflowers.


We were sitting at dinner last night and discussing how pretty the sunflowers were and what they need in order to last a long time out of the ground: sunlight and water. Plants' food comes from the sun.  It takes sunlight and convert it to energy (like we convert our food we eat into energy).  Plants also need water, like we need water.

It turns out potted sunflowers around here are a hot item for the neighborhood rodents. All three of our homegrown ones never made it to where we could harvest the seeds.

Anyways, J stated that he wanted to put the sunflowers he got from the market in the ground. We had to convince him that we'll have to wait until next spring to plant/grow new sunflowers in our pots.

Here's our two minute science lesson:
  • Plants in the ground have roots, which, besides drink the water and absorb the nutrients from the soil, act like big giant feet to hold the plant up. Without roots, plants tip over and don't get the water and nutrients (like vitamins) they need, which means they won't last long at all.
  • If you have the resources, you can try to "plant" a cut flower and have your kid observe how it acts. Why isn't it working like a plant you've grown from a seed?
----
We're having Science Saturday in the Park this Saturday, September 29, 10a-noon, in the SF Bay Area (CA). Feel free to contact me for further details. We'll be exploring bones and muscles and making our own functioning elbow models that you can take home. This activity is good for ages 2-100.

Tuesday, September 11, 2012

Science at the beach

It was the same day as the aquarium trip.  We may be home, but I'm still on vacation mode.

We took J to his first NorCal beach experience (we don't go that often since this Vegas girl can't do cold beaches).

Science you can do on the beach:

-- Guess how far the wave will come. We guessed based on the water line.


We guessed wrong:

Whoops!

-- Walk along the beach:


Compare foot sizes, step width, different walking patterns (bring a measuring device or an impromptu stick).  Whose foot is bigger?  Which is right/left?  How do your footprints change with the way you walk?  Then watch it all wash away with the waves.


-- Search for sea creatures, critters, fun birds, etc.  Why do they look the way they do?  What do they eat?  What eats them?  How are they affected by the waves or other sea animals?

It was nice of them to both pose

Other things you can do at the beach:

  • Talk about tides and their association with the moon.  There are high tides, where the water comes up high on the beach, and low tides, exposing different parts of the beaches and often creatures and seashells.  The tides are due to the interaction between the earth spinning and the gravitational forces of the moon and a little bit of the sun.  If you stay long enough during your visit, you can see the differences in tides.
  • Build sandcastles and other structures.  Can they withstand the waves?
  • Compare how you run on the sand to how you run on the sidewalk?  Which one is easier?  Which one is more difficult?
  • Fly a kite.  Which direction is the wind blowing?  How high can you make it go?
  • Hold a scavenger hunt.  What's the most interesting thing you can find?
  • Plan ahead and do a treasure hunt.  Make and follow a map.
  • Clean up the beach and talk about keeping the beaches clean so the sea animals can be happy and not swim in trash.
Hope your beach trip is also full of science goodness.

Friday, September 7, 2012

A trip to the Monterey Bay Aquarium

We took a break from at home science to venture out to a place J has never been before, The Monterey Bay Aquarium. I'll save you from the slideshow of family photos we took and stick to the science. Keep in mind, though I do specialize in "bio"mechanics, my marine biology knowledge ends with 6th grade life science and 9th grade biology.

J was drawn to the colorful exhibits, like the coral reefs. This one was fun because it used a magnifying glass enlarge pieces of the exhibit. J was mesmerized, as I think it was his first time realizing what magnifying glasses can do: little things look bigger!


Anything that he can touch instantly becomes his favorite. The touch pools were very nice. We talked mainly about starfish and how many legs they have, how they feel, where they live. In the pic below, he's touching an abalone.


This is a starfish hiding in an old shell of an abalone. Some sea animals blend into their backgrounds as a survival tactic.


We fought the crowds for a front row seat at the penguin feeding. J was more interested in the penguins bathing themselves (they were easier to see swimming around and honestly were cuter than penguins eating). J picked up on the way penguins eat! He asked, "Mommy, why do they wiggle while they eat?" The answer - they don't chew their food and that's how they swallow the fish, whole. He raised his hand to ask the handlers a question but was never called on. He wouldn't tell us what he would have asked.


Speaking of feedings, we saw the Kelp Forest feeding, with lots of fish and small sharks. The questions J came up with basically revolved around why the diver looked like he did and why he was breathing funny.


Answers: Why do divers wear a mask and make funny noises?  People need air to breathe, and we can't breathe air in the water. The diver brings in air from above in the form of a tank on his back. His mask is attached to this air, allowing him to breathe. The funny noises come from the way people breathe using a tank magnified by the microphone the diver was using to communicate to the volunteer during the feeding.

Why do divers look the way they do?  (This was actually in the form of about 10 questions on why the diver was wearing gloves,  pants, etc.) I had to remind J, "How did the water feel when you were touching the starfish?" Ocean water is cold. The wetsuit + gloves helps keep the divers warm. 

Why does the diver have flippers? To help them swim.

The jellies are my favorite, so I'll stick them in here and give a shout-out to my mom who was on the 2nd season of Family Feud and answered, "What animal can kill with its bite?" with, "Jellyfish!" She got X'ed and still gets a hard time from her family (and us). However, jellyfish can be extremely dangerous (though I wouldn't say they "bite"). I personally love their angelic motion through the water (of course in the exhibit - I have yet to encounter one in the wild).


The following picture was a fun site. I apologize for quality of the photo, as the exhibit was dark and the fish and hammerhead shark was at the bottom of the exhibit. J was the first to spot the shark. Then it was fun to see the shark always have a circle around him that was fish-free (smart fish). It was an excellent opportunity to bring up the food chain and that animals eat other things and animals to help them grow and stay alive.


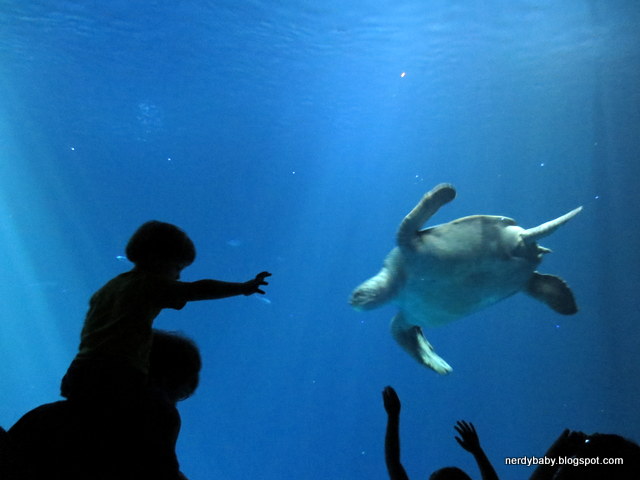
I've always loved sea turtles, and this one seemed so friendly and playful. The children squealed with delight as they tried to reach the turtle who came down to visit a few times. It's amazing to compare their size to humans.


We hope you enjoyed our field trip to Monterey Bay. We had so much fun.