Showing posts with label chemistry. Show all posts

Monday, June 16, 2014

Baking soda and vinegar volcanoes via a 5 year old

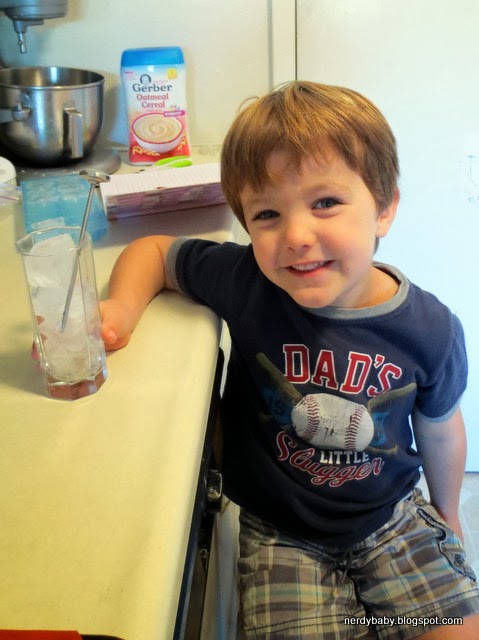
A few weeks ago, J woke me up from a much needed nap telling me that he wanted to do science. I asked what he wanted to do, and he really wanted to do balloon science, particularly baking soda and vinegar blows up a balloon. Frankly, I wanted to do something else (because though fun, it is a quick experiment that we've done more than once), but we kept the baking soda and vinegar part of the science he wanted to do. I asked him if he wanted to do volcanoes. He gave us an enthusiastic, "YES!"

Being lazy and having a new baby (who at the time was content), I didn't want to spend time looking up the experiment online. We decided to experiment on our own on how much baking soda vs. how much vinegar and the size of the container we were using for the experiment.


Mountainous material for the volcano:
I admit again that I am lazy. J had been given a lot of Play-Doh for a birthday last year, so I'd figure we'd use some up by covering the paper cup in different shades of Play-Doh. I don't want to be crafty at this point in my life, but here is a homemade playdough recipe if you'd like (painted paper mache volcano might be better if you have time to plan ahead and want it to look cool). The Play-Doh got soggy, but held up. We tossed it after we were done though we were thinking of saving it before we started, which is why we only put a small amount of orange and red on our volcano. We remained lazy and just used the Play-Doh container, without any decoration, to test a smaller container. J enjoyed it just as much as the decorated volcano since the "wow" factor is in the interaction between the baking soda and vinegar.


Place volcano in a pan with high sides, or you'll have quite a mess to clean up afterwards.

Amount of baking soda:
We used 1 tablespoon (tbsp) of baking soda as a starting point. We also used 2 tbsp, but 1 was enough to give multiple eruptions with our amount of vinegar, see note below on limiting reagents. We placed the baking soda in the cup first.


Note: We started with about 1/2 of a box of leftover old baking soda from the last time we switched it in the fridge, so there was plenty to experiment with.

Amount of vinegar:
We had a little under 1/2 gallon of vinegar to experiment with though we initially weren't planning to use it all. An adult poured it into a small 8 oz cup for J to handle. You definitely don't need a 1/2 gallon of vinegar, but we buy it by the gallon because it's cheaper and we can use it in impromptu experiments.

Size of container:
It turns out that if you have limited resources (ie. minimal amounts of mountainous materials, baking soda, or vinegar), go with a smaller container. If not, the bigger container works just fine.


Experiment:
Let your little one lead. We let J measure the baking soda and gave him the vinegar in a kid size cup. He knew what to do from other baking soda/vinegar experiments. I thought the reaction was over after the first pass of vinegar. J's curiosity lead to the discovery that 1 tbsp of baking soda can lead to multiple "eruptions" (reactions).


Notes:
With 1 tbsp of baking soda, the unmeasured vinegar (under 8 oz) poured in spurts seemed to be the limiting reagent. We poured more vinegar, and the reaction kept going. This is an advance concept for preschoolers, but you can definitely point it out and see if they follow.

After experiment free play:
I'm big on letting my 5 year old continue to play once the experiment is over. This experiment resulted in a sensory bin since there was a big glup of baking soda in basically water. However, when he transferred his pile of baking soda from one part of the tray too another, he got a sizzle. There was still a reaction left!


And apologies for the shaking camera. I was helping J with the experiment, and John was juggling the camera and this cute nugget:


She liked the volcanoes too. Well, at least she didn't fuss.

Have you experimented with baking soda and vinegar volcanoes? How did you model the volcano?

Saturday, February 8, 2014

Scientific observations of different balloons

I promised J some science after naptime. I decided to nap too instead of prepare a science lesson. He awoke pretty excited, so I asked him what kind of science he wanted to do. Since he was close to our stored, small helium tank while waking me up, he pulled that out. Not wanting to repeat the hover balloon lesson, I had to think of something else with balloons on the fly (which is harder to do in a sleepy stupor and with preggo brain). It's also been bothering me from the scientific standpoint that a post is going around Pinterest saying that our baking soda + vinegar reaction blowing up a balloon is a good alternative to helium.

I decided that we should play with the weight of the balloons and that this could be a good lesson for J in making hypotheses (educated guesses about what he thinks will happen when conducting the experiment).

Objectives:
*To determine what three different balloons will do: sink or float. The three balloons would be filled with 1. air (blown up with our mouths); 2. helium; 3. carbon dioxide (CO2) which is the gas product of the chemical reaction between baking soda and vinegar.
*To determine which gas is heavier: air, helium, or carbon dioxide.

J's Hypotheses:
*Hypothesis 1:
     1. Air will sink.
     2. Helium will float.
     3. Carbon dioxide will sink.
*Hypothesis 2:
     1. Air is heavier than carbon dioxide.
     2. Helium is lighter than air.

Experiment:
*Fill 1 balloon with air from your mouth.
*Fill (or obtain) 1 balloon with helium.
*Conduct the baking soda + vinegar reaction (see link above) and tie off the balloon once it's full of carbon dioxide gas.
*Hypothesize about what the balloon will do when dropped: sink or float?
*Drop each balloon and observe what happened.
*Make conclusions on your observations: where your guesses correct?
*Now using what you just learned from your balloon dropping observations, make hypotheses about which balloon is heavier or lighter.
*Weigh the balloons on the scale/balance (like the one we used in our balance game), or create your own balance from office supplies.

Results:
*Helium floated.
*Air balloon sank.
*Carbon dioxide balloon sank.

*Air balloon is heavier than helium:


*Carbon dioxide balloon is barely heavier than the air balloon, but it is also smaller.


*The air balloon is slightly heavier than a deflated balloon (but not by much).


Discussion:
*There is a difference in balloon volume between the air and the carbon dioxide. We didn't have a large enough reaction to really blow the balloon up to the same size as the one we blew up with our mouth. Even with a smaller balloon volume, the carbon dioxide balloon is heavier than the balloon we filled up with our air.
*It's also important to note that carbon dioxide is a product of what we exhale when we breathe (or blow up a balloon). However, there are a lot of other gases mixed in with the carbon dioxide.
*We couldn't figure out a good way to measure the weight of the helium, so we tied it to the scale, which immediately raised the scale on the side of the helium balloon, but helium is lighter than air.

Some other fun we had:
*We played, what can we tie the helium balloon to in order to keep it from floating to the ceiling.
     - We ended up using a Cootie Bug.


After the experiment, J thought it would be fun to launch balloons with our balance/scale.
     - I always recommend well-supervised free play time after experiments.
     - Kids are awesome at finding fun new ways to explore their world.
     - Don't forget to explain what's happening as they make new discoveries.

Saturday, November 16, 2013

Science Saturday: Halloween Goo!

We had our last Science Saturday of 2013 the weekend before Halloween and decided it would be most fun to celebrate Halloween with Goo! Here's the original silly putty science post. This Science Saturday activity was a repeat of this Silly Putty Science Saturday from last year.

I encouraged friends to dress up in Halloween costumes and then realized that it was going to get messy. Luckily, I found these disposable aprons on Amazon (affiliate link). We only had one casualty, an adult sweater sleeve, but I think he got enough goo out and it was recoverable.

In honor of the Halloween spirit, here's my Capt. Hook and Smee before the festivities:


We had fun mixing glue, liquid starch, and colors to make our silly putty. I'm still surprised about how much little kids love mixing colors and telling you what the combination of colors make. We had green, purple, orange, and all of the primary colors represented.

Our friends also had fun examining the physical properties of silly putty. If you pull it really fast, it rips pretty cleanly:


If you pull it slowly:


You can make a jump rope!

Thanks to everyone who showed up and had fun! I'm hoping to find a community room/center, so we can start Science Saturday back up in January or February (to make up for the 1-2 mo I'll be out of commission in the spring).

Saturday, November 2, 2013

Does it dissolve?

We subscribed to the Magic School Bus Science Club when I found a half off coupon (making each kit ~$10/mo). J is a little young for the intended age group, but many of the experiments he can do with guidance. He gets so excited when he sees the Magic School Bus package on the doorstep. We usually do an experiment the following weekend (though we haven't done more than 1-2 before the next month arrives - they are saved for later use of course).

This month's experiment packet was on water. The experiment that we chose was Substances Dissolving in Water. We used their recommended mixtures and added another (see details of the experiment below). We also didn't use test tubes standing up in clay, as they recommended. Instead, we used custard bowls and mixed the substances with clean spoons.


Materials:
*6 custard dishes filled half way with water
*vegetable oil
*food coloring
*salt
*sugar
*sand

Hypotheses:
*Guess whether the material will dissolve (go away) when combined with water. A good way to think of it would be: can you separate out the material to get just water + material after you combined them? If you can't the material dissolved.

J's Hypotheses: Does the material dissolve?
*Water and oil: Yes
*Water and salt: No
*Water and sand: No
*Water and food coloring: Yes
*Water and sugar: Yes

Directions:
*Add a few drops of oil to one cup and stir.
*Add a few drops of food coloring to one cup and stir.
*Add a teaspoon of salt to one cup and stir.
*Add a teaspoon of sugar to one cup and stir.
*Add a teaspoon of sand to one cup and stir.
*Observe your matter. Did each one dissolve in water?
*Record your observations.

Results:
*Water and oil: No
*Water and salt: Yes
*Water and sand: No
*Water and food coloring: Yes
*Water and sugar: Yes

Oil at the top, water below (not dissolved)
J loved this simple science experiment. His hypotheses were all over the place, but now if he does this experiment in school, he'll know which material dissolves in water.

I can't wait to try other experiments from the Magic School Bus.

Sunday, October 6, 2013

Melting Ice

Objectives:
*Measuring temperature
*Phases of water
*Hypothesis formation

Background:
J wanted to do science, and I have been a slacker the last few weeks/months. I wanted to see how well J did with reading a thermometer and making hypotheses (educated guesses), so I put together a melting ice science project on the fly. We even put it in J's Science Lab Notebook.

Methods and Materials:

Basically this project consists of  filling a clear glass full of ice and taking the temperature throughout the day as it melts.


Hypthesis formation:

I asked J, "What will happen to the ice?"
-He replied, "The ice will met to water."

I then asked, "How much water will be in the glass?"
-He stated, "To the top of the glass!"

Taking the measurements:

We set up the experiment and ran a few errands and took naps. I'm pretty sure we have a digital thermometer, but analog is more fun. J was able to tell what numbers the thermometer read (at least to the nearest 10).

10:35a: 20 deg F
11:00a: 30 deg F - ice is beginning to melt
1:00p: 32 deg F - ice is 1/2 way melted
3:00p: 60 deg F - ice is melted
5:45p: 70 deg F - water is now room temperature.


Note, the ice melted to water and the glass was half full (or half empty?). Volumetrically, ice takes up more space than water, which is why when you don't get free refills on your drink, you want less ice so you end up with more liquid.

J was pretty disappointed that he guessed wrong, but I told him that's ok. It's why we experiment, so we can learn more. Next time he'll know the answer. He was pretty excited for this impromptu science lesson.

Stay tuned for our colored ice cube experiment which we set up yesterday to do sometime soon.

Saturday, July 13, 2013

Science Saturday, Ice Cream!

I scream. You scream. We all scream for ice cream!

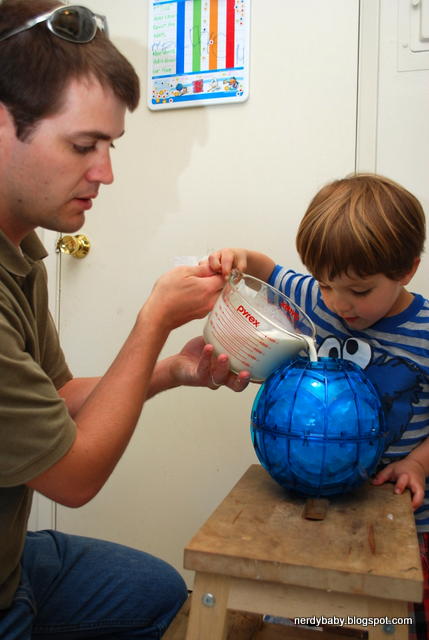
We had our best turn out for Science Saturday. The park was full of little chemists learning how to cool their ice cream mixture using salt + ice (it works by lowering the freezing point of water). Here's the basic ice cream in a bag lesson. We tried reducing the amount of cream and tried a single baggie for the ice cream mixture (instead of double). The recipe worked very well with all milk and with milk/cream combination. Some parents opted to go with a reduced sugar recipe (using 1 T instead of 2 T), and there were no complaints.

If you're doing this on a larger scale: For about 30 kids, we needed about 30 pounds of ice (1 lb/person), 12 lbs (three 4 lb boxes) of ice cream rock salt, 2 gallons of milk, and 1/2 gallon of cream. Since we used the remainder of our bulk vanilla, so I can't tell you how much. It was probably at least 2 oz. The recipe uses a pretty minimal amount of sugar, so a small box/bag of sugar will definitely suffice. We also had some mix-in like sprinkles and mini chocolate chips.

Experiment on your own! You can try other ice cream recipes. This method to make quick ice cream should work in theory on anything you'd put in an ice cream maker. Enjoy a cool summer treat while learning about science.

Sorry, I was too busy with ice cream making that I didn't get a chance to take pictures of the event. Trust me, we all had a good time!

Sunday, June 30, 2013

Follow-up: Baggie Ice Cream Temperatures

We made baggie ice cream again for dessert tonight (it's been a warm weekend and cold ice cream tastes so good).

My new thermometer (affiliate link) arrived last week, so I thought I'd report on the temperatures of the experiment.

The rock salt and the ice mixture started out around 31.7 degrees Fahrenheit (freezing temperature of water is 32 degrees F, so the salt was already starting to work). After 10 minutes of play, the temperature of the salt/ice mixture reached 18.0 degrees F. The ice/salt mixture was so cold that it froze the condensation that was coming off of the bag! Salt does lower the temperature of ice.

I didn't measure the temperature of the ice cream mixture because I didn't want to wash the probe before (lazy, I know). I'd recommend washing your thermometer after the salt/ice mixture measurements as salt can cause damage to some materials.

Wednesday, June 26, 2013

Baggie Ice Cream!

We started off the week making ice cream in a ball, but as far as Science Saturdays go, ice cream made with the ball is not very feasible on a larger scale since it takes over 20 minutes and the balls are expensive.

Instead, we took some knowledge from the recipe book of the ice cream ball (the heavier the cream, the faster it'll freeze) and combined it with this ice cream science activity from 3M. The ball recommended heavy cream for the fastest freeze time, and the 3M activity says 1 cup of milk or half and half would work. Personally, I didn't like the taste of all cream ice cream, and all cream would get expensive on the larger scale. I tried 50/50 this time, but I think I'll still like the taste better with even less cream (I'm a lighter ice cream gal) - so even more experimenting here before Science Saturday next month.

J's a little young to understand the lowering of the freezing point of water using salt. It doesn't help that we live in a place where it doesn't freeze, so we don't need to salt our sidewalks during winter time. I also wanted a 10 minute maximum for attention needed. The mixing of ingredients and change of matter is scientific enough for my four year old, and the fact that he gets ice cream at the end of it kept his attention fairly well (in fact, it made him pretty hyper).

Ice Cream Recipe (adapted from 3M activity)
1/2 cup heavy whipping cream
1/2 cup milk
1/2 tsp vanilla
2 T sugar

-Combine all ingredients into a quart sized zipped baggie. Zip the baggie, letting out all possible air.
-3M says to double bag the ice cream so we did (again with no air bubbles since air acts as insulation). I'm sure this is just so the ice doesn't accidentally puncture the ice cream mixture. I'll take extra precaution to ensure non-watery+salty ice cream.
-Place ice cream in a gallon sized zipped baggie full of 4 cups of crushed ice and 1/2 cup of rock salt. Zip the gallon baggie, and 3M says to gently shake. J got a little excited with the shaking that by no means was it gentle.

We set a timer for 10 minutes and started shaking the baggie around on squishing/mixing the ice cream with our hands. However, after a minute or two, the ice + salt got too cold for our sensitive hands. Instead of reaching for our "winter gloves" which I just thought about, John grabbed a towel and wrapped the ice cream + ice in the towel. We tossed it around that way for a few minutes. We combined it with punching/kneading the baggie through the towel.


The timer dinged after 10 minutes and the ice cream was perfect! It was enough to even split between J and me. Despite our cold hands setback, this method was actually easier and less to clean up than the ice cream ball. All we had to do was toss the bags - no dishes other than the few measuring devices and the bowls we transferred the ice cream to. You could enjoy the ice cream right out of the baggie instead of bowls.


The seal of approval

One satisfied scientist

Discussion for younger kids:
*What ingredients are you mixing together? What if you vary the ingredients (ie the ratio of milk to cream or additives like cookie pieces or chocolate chips)? Do you think it will work the same? How do you think it will taste?

*Is the ice cream mixture solid, liquid, or gas when you mix it together? What about when it becomes ice cream?

*Is ice hot or cold? When we stick something in ice does it get hotter or colder? What about the ice; does it get hotter or colder?

*What happens if we just stick the ice cream mixture in the freezer? How long will it take to freeze? Does it taste the same as the ice cream you made in your baggie?

Add on discussion points for older kids:

*What did the salt do to the ice? Why did the salt melt the ice?

*Get a thermometer and measure the temperature of the ice cream mixture, the ice before adding salt, the ice immediately after adding ice, the ice cream after it freezes, the ice + salt mixture after the experiment is over. What did you observe? What's the freezing point of water? Is the ice + salt mixture below the freezing point of water?

All in all, baggie ice cream was a success, and I do think ice cream making would be feasible for the next Science Saturday. Tentatively, we're scheduling it for Saturday, July 13th (of course we depend on weather and family wellness). Shoot me an email if you want specific details. Hope to see you then!

Related Posts:
*Baggie ice cream follow-up: temperatures of ice+salt.
*Science Saturday in the park: ingredients needed for 30 kids.
*Make ice cream in a ball

Sunday, June 23, 2013

Ice Cream Making - It's Science!

This was my second year with BioX Kids' Day, and both years, I saw many kids having fun with the YayLabs! ice cream ball in the chemistry booth nearby. I wanted to try, but the day is so jam packed that there is no breaks for helpers (at least from my experience).

How does ice cream making work? The key is getting the mixture to mix around while surrounded by salt and ice. Salt is a special ingredient that lowers the freezing point of water (ie. it melts the ice to make colder than ice water!!).

I think J's school has made ice cream with the kids, but I wanted to do it on my own with him. I decided to purchase the ice cream ball from Amazon (affiliate link) (as a bday gift to myself - thanks to my bro and sis-in-law).

The ball came with a simple recipe: 1 pint of cream (we used heavy whipping cream), 1/3 cup + 2T of sugar, and 1.5 tsp of vanilla.

After filling the ball portion with crushed ice and rock salt (Safeway had a box of special ice cream making salt for $0.99 - it's not food grade, but it's great to use in experiments like this since it won't be directly touching what we'll eat):


we mixed the ingredients in a separate bowl:


and poured into the ice cream compartment:


Don't forget to seal both compartments!

Then we got to tossing/rolling.


The book that came with the ice cream ball had approximate freeze times for ice cream. The heavier the cream, the faster the freezing time. Since we used the 2nd heaviest cream (heavy whipping cream), we decided 20 minutes would be a good time based on their recommendation.

And this is what we got after 20 minutes of "play":

A little soupy

I was warned by a few parents at the last Science Saturday when brainstorming ideas for the next Science Saturday that ice cream making does take a long time, which is why I'm currently testing the ideas. Really, the ball took 20 minutes and it was soupy (but still good enough to eat as ice cream). Keeping J's attention that long was tough. Plus, it's too expensive to get enough ice cream balls to make it worth while for a Science Saturday event.

However, I'm still determined to make ice cream making work on a larger scale for a Science Saturday event. Tonight, we had much more success just making ice cream in a baggie. I have pictures, video, directions, and activities surrounding baggie ice cream that I'll post later in the week. Stay tuned.

Until then, I hope you are enjoying your summers thus far!

Related Posts:
*Make ice cream in a baggie

Tuesday, October 23, 2012

Happy Mole Day!


What kind of science loving nerd would I be if I didn't wish you Happy Mole Day!  Too bad it's a little late.  Maybe I'll be more on top of my game next year.

On Mole Day, we celebrate Avogadro's number, which is 6.02x10^23.  Some people celebrate it at 6:02 in the morning of 10/23.

What is a mole? It's a unit consisting of 6.02x10^23 somethings (that's a lot of somethings!).

In 10th grade chemistry, we celebrated by making cute little moles (see above).  Mine was Super Mole, but just recently lost his cape after he became a toy for the 3-year old.  He saved the world 6.02x10^23 times, if I remember right.  I also made a Mole Kent who had a super awesome telephone booth where he changed to become Super Mole.  My little sister reincarnated Mole Kent to Whoopi Moleberg, who was then saved by her chemistry teacher (not sure what her mole consisted of - remind me, Julie?).

What's the whole point of Mole Day??  To remember the number!  10/23 falls relatively early in the school year, and it's a number chemistry students frequently need to use, so it works very well.  I can still state the number 15 years after celebrating my first Mole Day.  Thanks, Dr. Mr. P (my high school chem teacher)!

There's no real set way to celebrate.  We made cute moles and gave them stories.  I hear a lot about eating guacamole on Mole Day (but we're picky eaters and green paste isn't on our list of things we eat).

How do/did you celebrate Mole Day?

Monday, October 22, 2012

Water surface tension - pennies in a cup

Note: We got the idea for this experiment from Science Play book by Jill Frankel Hauser.

I grew up with a scientist mom, and her favorite experiment was the drops of water on a penny to analyze surface tension of water. That's a little too hard for my 3 year old to do (I remember being somewhere around 7 for those experiments). So when I found the experiment with placing pennies in a cup of water, I figured it would work for J.

Now, being a scientist myself, I had questions of my own that weren't answered by the book, like how does temperature affect surface tension of water? I decided that could be our experiment.

To complete the experiment, I filled up clear plastic glasses with different temperature water (cold water from our fridge, cold water from the sink, hot water from the sink - ours comes out really hot!) almost to the top of the glass. While the glass was on the table, I used a clean medicine dropper to fill the glass to the brim. We started gently adding pennies, one at a time waiting for the water surface to be calm before we placed another one on there.

The set-up

Water careful filled to the brim

The adults showed J how to do it.


J was so excited to do it himself, but three year olds aren't super careful and like when things splash.


Gently add pennies 1 by 1

In general: as temperature increases, surface tension should decrease (making it harder to stick together). Our hypothesis (educated guess) was that the colder glasses of water would hold more pennies.

Our results:

Cold glass: 26 pennies (J)
Room temp glass: 25 pennies (Big J)
Hot glass: 18 pennies (Mommy)

Things to discuss:
*What shape does the water make after adding pennies?
*How many pennies did you get into the cup before it spilled?
*How did the temperature affect the surface tension in your experiment?
*Which cup of water held the most pennies?
*Repeat the experiment with different liquids (ex. juice or isopropyl (rubbing) alcohol -under extremely close adult supervision). How do the different liquids act when the pennies are placed in them? Why do you think that is?

Things that could have affected our results:
*Cups might not have been filled to the same levels.
*We didn't place the pennies in gently enough, causing a splash.
*Pennies weren't fully dry between cups (adding more water).
*Someone could have accidentally bumped the table (it happens with a three year old).
*Pennies had various amounts of dirt on them. A piece of grass ended up in the cold cup, which could have affected the experiment.
*Each person did pennies in a different glass. Ideally, we would repeat the experiment with the same user for all three glasses, but we're not that patient around here and everyone wanted a turn.

Happy experimenting!

Monday, August 27, 2012

Silly Putty Saturday Science in the Park

We are still organizing and recovering from our move, but I wanted to keep up the momentum with Science Saturdays in the park. I didn't want to miss August (it seemed like everyone scheduled something for Saturday, August 25th, including me). We squeezed it in during the morning (sorry to those I promised that it would happen in the afternoon - my afternoon was pretty jam packed) in a different park than normal (they upped the reservation fees at the park we were using).

I decided to keep it simple and do something easy, fun, and I know works: silly putty!


I was busy baking a koala summer cake Friday night for Saturday afternoon's event that I didn't get the chance to write up the recipe for the table. I did get plastic tablecloths though for this event since the silly putty picks up everything and park tables are filthy! I thought on the fly and wrote the recipe with Sharpie on the table cloth. It worked nicely! I didn't even have to worry about taping down paper or paper getting wet and messy (this was a super messy event). Before you start, have plenty of wipes handy.


The ingredients that you add to a zipped baggy:


Once in the bag, zip the bag, and shake, squish, and knead:


Some were over excited and wanted to experiment to see what happens if you mix all of the colors:

You get a poop color
Once the white in the bag is mostly gone, take out the putty and continue to squish, knead, stretch, and pull in your hands until it becomes silly putty texture.


Place the silly putty in a clean bag to take home!

Some discussion points:

  • How does the silly putty feel? You can ask this at different stages of this project.
  • What do you think will happen when we mix glue and starch? Do you think something new will be made?
  • What are we using to measure the ingredients? We use less starch than glue (about 1/2 as much) - bring up fractions if you think your kid would like the introduction.
  • What are the different colors?
  • What do we get when we mix colors?
  • What happens if we place silly putty shaped in a ball on the table for a few minutes?
  • What happens if we pull the silly putty slow?
  • What happens if we pull the silly putty fast?
  • Does silly putty bounce?


** It seems as though an email list from Lego Race Cars in the park was shredded before I got to put the names on the email list. If you thought you were on the email list but didn't get the email about Silly Putty this past weekend, please use the email on the left side navigation bar to let me know. Also, if you haven't had the chance and want to be on the email list, please let me know too!

Thursday, July 19, 2012

Silly Putty Proportions

This silly putty recipe made a gigantic amount of silly putty and took 2 adults a good 30 minutes to knead (with a little help from J).  Ultimately, it split up into quite a few different little hands (who weren't around to help knead it).

This large silly putty blob was made from 2 cups white Elmer's glue and 1 cup liquid starch (StaFlo) (J was in charge of the food color, so I'm not sure how much actually made it in the batch):

Massive amount of silly putty

I wanted to experiment since that's what scientists do best (and I wasn't 100% satisfied with try # 1).  I wanted to get the optimal proportion for each kid at the preschool I'm visiting on Friday (mainly to be organized) and make sure the experiment could be replicated and the questions I ask will be able to be answered.

So, I varied the glue/starch ratio to see what happens.  I started with 1:1 since I found a site that said it works that way.  FALSE.  It was just a gooey mess, so I added more glue to get it 1.5:1 (white).  I kept the other at 2:1 (blue).

The white putty had 3/16 of a cup (1/8+ half of 1/8) of glue and 1/8 cup of liquid starch.  The blue had one drop of blue food coloring, 1/4 cup white glue, and 1/8 cup liquid starch.  Both fit nicely into zipped sandwich baggies.


My opinion of the two:

I'll stick with the 2 parts glue to 1 part liquid starch (the original recipe).  Mixing it in a smaller batch allowed less kneading and it absorbed the liquid starch much better than a bigger batch.  Thus, it's not as gooey or stretchy as the previous batch.  It actually feels more like silly putty.

The 1.5 part glue to 1 part liquid starch made the putty come out almost the texture of egg whites (and I'm guessing having it white color didn't help me with that association).

Anyways, I'm excited to be bringing science to the kids tomorrow.

Main points to Friday's lesson:
*Intro to chemistry - you have two (or more) different parts, and when you mix them together, you create something new.
*Intro to material science - some materials behave differently when pulled at different rates (under different loading conditions, ie. soft gentle pull versus a fast tug).
*Have messy fun.

Monday, July 9, 2012

Make at home silly putty and no-cook playdough

I'm preparing for a fun visit to a local preschool.  I was given the theme "Silly Lab" and free to do whatever came to mind.  Immediately, I got a vision of little kids with gunk and goo.  Sorry in advance, parents.

For J's 2nd birthday, we did a very non-toxic cornstarch based goo, and it was a hit, but it was VERY messy.  I told the director that I'd try some homemade silly putty recipe this weekend and report back.

So here's the recipe for homemade silly putty that I went with.  I actually found one with measurements, so I went with that: 2 cups Elmer's White Glue, 1 cup StaFlo (according to all sources it has to be the exact brands) + food coloring.


Combine ingredients into a plastic zip baggie.  If you use 2 cups of glue + 1 cup StaFlo, use a quart size bag, as the sandwich bag was too small.  I recommend 1 4oz bottle of glue + 1/4 cup StaFlo for something a little smaller (or even half that!).

Glue

We're not that patient

Liquid Starch

Food coloring

Kneed, press, shake the bag.  After a while, solids form.  This is where you should start to get your hands dirty.  We kneaded the mixture inside of the bag some more before pulling it out.  We started stretching, folding, and kneading some more for about 15-30 minutes.

Mixing it together
Kneading it

Stretching it

fun texture

Sticky

Is this what pulling taffy is like?

This has to be my fave pic of the day

This made a giant amount of "silly putty"**.


I left it out all day to dry (on top of gallon plastic baggies since the putty picks up every piece of dirt/crumb), kneading it intermittently between my other Saturday duties/obligations.  While we were meeting our new neighbors, I was kneading the mixture.  The new neighbor's 3 and 5 yr old girls thought the putty was great!  While I continued kneading, J and our two new friends divided half of my putty and started playing.  They all seemed intrigued by the stringiness of the putty (all over the freshly cleaned carpets, I'm sorry :-( ).

What's left after we shared with the neighbors - still drying

**I'm disappointed that this is called "silly putty" hence the " " 's.  It's a very similar texture to Nickelodeon Gak back in the day (yes, I dated myself) - it even makes the farting noise.  I didn't point this out to my 3 year old boy yet.  It's still great and has a lot of similar properties to silly putty (viscoelasticity).  See below lesson for how to demonstrate this property to kids (if they don't figure it out on their own).  After drying overnight (and getting a dry film on top that we removed since we didn't wake up every hour or two to knead it like we were doing during the day), it felt more like real silly putty, and it bounced a little, but not super high bounces.

Safety warning: though Elmer's is non-toxic, liquid starch, such as StaFlo, probably shouldn't be consumed.  I don't see warning labels, but it has lots of chemicals.  It's used to starch clothing, not for eating.

Side notes: stores are getting in back-to-school mode and you can get bottles of Elmer's glue for super cheap.  4oz bottles (1/2 cup glue) were $0.50, and I'm sure that's not the best deal out there.  I was worried about where to find StaFlo.  I searched online.  Amazon does have it, but so does Walmart.com.  However, the store locator for the item was not available.  I decided to start my search for liquid starch at Walmart and succeeded (under $3 for a gallon in the laundry section).

We also did a simple homemade playdough recipe when the blog was a baby.  It was cooked, which makes it hard for kids to do themselves.  I found another no-cook playdough recipe on Cooks.com to try today.  I substituted cream of tartar for alum (there was a comment that said in England they use c of tartar as a preservative, similar to alum - and I've seen it on other playdough recipes, so I did it too instead of buying alum).  It's super salty (I didn't even use the full amount of salt) and gritty, but it'll work for this lesson.

No cook playdough


Lessons to learn for this messy, silly lab:

Chemistry:
Measuring
Mixing different ingredients
Different chemical properties (viscoelastic, plastic)
Making a mess

Physical Science:
How do different materials react to different stresses?

Things to do to demonstrate:

*Slowing stretch or let the putty hang.  What happens?
*What happens when you pull the putty apart quickly?
*Squish the putty into something (like a cup).  Does it make any sounds?
*Which material keeps its shape when you squish it?
*What happens if you let the putty sit for a few minutes?
*Can the putty bounce?  Can the playdough bounce?

J's quote: "It's like icky sticky bubble gum!" when referring to his first experience with the silly putty.

Related Posts: