Showing posts with label preschool. Show all posts

Friday, September 8, 2017

How do Animals Help Seeds Travel?

Guest post by Jennifer from Education.com


In this fun educational project, children discover firsthand how animals can help distribute seeds in order to spread them across the land.


Many plants grow from seeds – their seeds are like baby plants. Seeds move around; that’s how plants start growing in new places. How do seeds move? Do mama trees push their seeds in dirt strollers? Of course not! One way seeds travel is by catching rides on animals: a seed in one place gets stuck to an animal’s fur, the animal moves, and then the seed falls off in another place. The animals help DISTRIBUTE the seeds.


Experiment Questions:
  • Did you catch any seeds by acting like animals in your yard (or playground or park or nature area)?
  • Did some fur catch more seeds than others?
  • Did different kinds of fur catch different kinds of seeds?
  • Did some seeds stick to fur better than other seeds?
  • What about the seeds helped them to stick?


What You Need:
  • Socks
  • Scraps of fake fur in different textures
  • Glue
  • An outdoor area with lots of plants


What You Do:
  1. Glue the scraps of fur onto the old socks.
  2. After the glue dries, pull the socks on over your shoes.
  3. Go play outside in your yard or playground or park or nature area.
  4. If there are more kinds of socks than kids, change socks now and then to give all the socks a try.
  5. At the end of your play, remove the socks and examine them carefully. Think about the research questions above.
  6. Talk about the plants and animals you have in your outdoor areas and how you think they help one another.

------

Jess Note:

I  think my three year old would love to play pretend and be an animal carrying seeds around. I can't wait to try out the experiment though right now, everything around us is pretty brown and barren. I can see this being more effective during dandelion and prickly grasses(/high allergy) season. I'll circle back with how the lesson went at our house.

Sunday, August 27, 2017

Solar Eclipse 2017

It didn't seem all too long ago we were blogging about the last solar eclipse that was visible in our area. Five years flies by!! My then 3-year-old is now 8, and the newbie is now 3!

A solar eclipse is where the sun is blocked by the moon. A total solar eclipse is where the sun is completely blocked by the moon. A total solar eclipse in a particular area is fairly rare. The last one in the US was 1979. There's another one in 2024 crossing over Texas. Always take proper precaution when viewing eclipses, especially when viewing them with children.

We knew the eclipse was coming. We even have family in the Salem, Oregon area. We also knew that 1. Oregon isn't 100% predictable for August weather (I moved into college in Portland on a super rainy day somewhere around the 20th of August many moons ago). 2. School would already be in session for J (and missing a few days during the second week of school for something that didn't seem to be a guarantee of a good view seemed a little irresponsible). 3. We hate crowds and traffic.

Anyways, ~75% seemed good enough for me. The elementary school bought each student a pair of eclipse glasses and took the kids out during extremely well supervised (by parents/adults) increments to view the different stages, and they had a fun coloring/maker-type activity displaying the different phases of the total solar eclipse. At my daughter's preschool, the younger classes (of which my daughter is in) did not participate in the special event though they did talk about it.

There was an impromptu viewing party at my work. I even made my company's social media page while viewing the eclipse. That's pretty fun. Here are my personal pictures from the event.

The glasses were on, but the sun was hiding behind the clouds over my left shoulder (As it started, the sky was foggy in our area and super clear in Oregon, go figure).


Finally a part in the clouds as the eclipse just started (cell phone picture taken through the solar eclipse glasses):


Our maximum coverage from the Bay Area, CA. Since it was cloudy/foggy to begin with and only ~75% coverage, we didn't see too much noticeable change in light.


Yes, I work at a pretty nerdy place. Someone grabbed a colander (lazy or not, this is a great substitute for a pinhole projector), and I suggested propping up the glasses in the picture.


Explore more:
NASA has a great rundown of the Total Solar Eclipse and what you can do the next time one is in your area.

Sunday, July 19, 2015

Melting Ice in the Fridge

Saturday night at dinner time had us conversing about our world. Somehow, the conversation was turned to, "What do you think will happen if we put ice in the fridge?" J, without hesitation, hypothesized that it would melt. Why? Because he's just that smart (intuition).

John and J put an ice in a cup and placed it in the fridge over night.

J checked on it during breakfast this morning and found that it wasn't completely melted! He was baffled. We left it in the fridge until lunch time, when it was found completely melted. They put another piece of ice in a cup and left if out between breakfast and lunch. That too was completely melted by lunch time.

Why did the fridge ice take longer to melt?

The temperature in the fridge was above freezing, so the ice would melt. It took a long time since the temperature in the fridge was in the high 30 (deg F) range. The air from the fridge did melt the ice. It was just slightly warmer than the ice itself, so it took a long time.

The temperature of the room (~72 deg F) was much higher than freezing point (32 deg F), so it didn't take as long to melt the ice cube.

Other things you can try with ice:

Melt an ice cube in front of a fan. Have one away from the fan to compare the two. What happened?

Record the temperature of various locations around your house (fridge, freezer, closet, patio, washing machine, etc.) with a thermometer and predict which ice cube will melt the fastest based on the knowledge you learned here. Place an ice cube in various locations and see if you're right!

Related Posts:
     *Melting ice, measuring temperature
     *Melting ice with colors

Sunday, March 22, 2015

Ultimate Pi Day Party! 3-14-15 9:26:53

Last week, we celebrated the Ultimate Pi Day (3.141592653...) with a Pi Party in the park. We had 20-30 people attend and had so much fun! Here's our Pi(e) spread complete with many homemade and store bought pies.


One of our nerdy attendees made this sign by the pie. Do you get it? Also, our local grocery store got in on the Pi Day fun...notice the price of the mini pie?


We lined the other tables with butcher paper and traced circles for Pi Day Posters and Investigating Pi. One of the attendees decided to reverse my investigating pi lesson to measuring the circumference with a string and seeing how many times she could measure the diameter from the circumference string (a little more than 3). The kids were more excited about the Pi-rate Treasure Hunt! Who can blame them?


Pi-rate booty!

Pi-rate Treasure Hunt:

I printed out an aerial Google Map of the park with clue #1 marked. The park where we had the event had a walking path, so I stuck the clues in obvious places along the path for the problems. Hints were more hidden, so the participants had to actively look for those if they needed the help. The kids had to answer 5 questions (preferably from the same set of questions) to get a prize from the treasure chest.

I had three levels of math problems for the kids to find and solve. I cut and pasted the problems onto colorful 3x5 cards:

Easy (green): Preschool
Medium (orange): k-2 grade
Hard (pink) = 3 grade+

Then I had some problems for adults (yellow) who might have accompanied their kids around. Those were more high school math, up to pre-algebra.

Here are the problems I came up with (note, my goal was to not make anyone cry).

Easy Pi-rate treasure hunt problems
Medium Pi-rate treasure hunt problems
Hard Pi-rate treasure hunt problems
Pi-rate treasure hunt problems for the adults

How did you fare on the Pi-rate Treasure Hunt questions?

How did you celebrate the Ultimate Pi Day??


Just for fun, here's our annual Pi Day Family Photo:


And one of the kids and me:


Previous years' Pi Day Photos.

Thursday, March 12, 2015

Pi-rate Treasure Hunt

Guess what?? Pi Day is my favorite nerdy holiday! My favorite activity so far has been celebrating with a Pi Party in the park. We made Pi Day Posters and Investigated Pi (and ate pie, but that's a normal Pi Day activity). Along with that fun, I created a treasure map and some fun math questions and sent the kids on a Pi-rate Treasure Hunt!


I used a screenshot of the park on Google Maps using the satellite feature and marked a path for the treasure hunt. I had five stops along the treasure hunt, each stop had four different levels of math questions. Clues to solving the problems if they needed help were hidden nearby, so they had to look for them if they really wanted the help. The fifth problem was at a treasure chest. After solving that problem, the kids received a small prize (leftover party goodies, like mardi gras beads and silly glasses from years of storage). (Note: edited 2/27/17 to past tense and linked to the math problems).

Easy - 3-5 year olds (preschool)
Medium - 5-7 year olds (k-2nd)
Hard - 7-9 year olds (3-4th)

And just for the adults to play alongside their kiddos:
Adult - Trig and pre-calculus level - brush up on your equations :-)

Happy Almost Pi Day to you!!

Related Post:
Ultimate Pi Party - pictures of our treasure hunt included!

Wednesday, September 10, 2014

Card games for preschoolers

With the new baby, we've been spending a lot of time at home and encouraging quiet activities. Being from Vegas, I have more than my fair share of cards, but J recently received a Batman deck for his birthday, which increased his interest in card games. Here are a few of our favorites so far and the skills that they teach the players.


Go Fish!:
How to play: Shuffle the deck of cards. Each person gets 5 cards, and the rest of the cards go in a pile in the between the players. The players look at their cards (not showing their cards to opponents), and if they have any matches, the players put them face up in front of them. The players then take turns asking one another if they have a card that would match a card that is currently in their hands. If the person asked has the card, they forfeit (give) the card to the asker, and the asker gets to go again. If the person asked does not have the card, they say, "Go fish!" and the asker picks from the pile of cards in between them. We play a variation that if the person draws the card that they just asked for from the "Go fish!" pile and gets that match, they get to go again. We play until one player gets rid of all of his/her cards. Then we count everyone's matches, and the person with the most matches win!
Skills: Matching is important in science, especially biology with classification of species. Go Fish! also teaches the mathematical skill of strategy where the players have to listen and remember who asked for which cards. The players want the most matches.

War:
How to play: Shuffle the deck of cards. All of the cards get evenly distributed between the players (2-4). The cards are placed face down in a stack in front of each player. Nobody looks at their cards. Each player then holds their deck of cards face down and places the top card from their deck face up in the play area, in between the players. The player who drew the largest card gets the cards in that round (which the won cards go face down into a pile/stack in front of the player, when a player gets to the end of his/her deck, he/she picks up and shuffles the cards in front of him/her and resumes drawing his/her cards). If the largest card is a tie, the players go into "War" which requires the tied cards' players to place 3 cards face down (they put down 1 card per syllable while saying "I declare") and then one card face up (saying "war!"). The person with the largest face up card gets all of the cards that round. If it's tied again, repeat "War" until someone gets a larger card. All  number cards (2-10) have face value, and then the face cards are greater than number cards. The order of face cards are Jacks < Queens < Kings < Aces. Repeat the drawing/collection of cards/War until one player has all of the cards (the winner has all of the cards).
Skills: War teaches the mathematical skill of greater than/less than. This is a game of chance. It all depends on the cards the dealer gives whoever is playing. You aren't allowed to peak at your cards, so there's no strategy here. It would be nice if you get the higher, face value cards through wars, but you have no control over it.

Stay tuned for our "More Card Games" that we've taught J. They need a little more of a schematic description either via pictures or diagrams, and I'm not doing so well in the free time category at the moment.

Tuesday, July 15, 2014

"Look Mom! It sticks!"

Fun with friction!


Felt and fleece work really well when it comes to adhering to other materials using friction alone. This is a great, quick science lesson to hypotheses about what will and won't stick vertically on things. Would the pillow stick to the wall? What about a heavier pillow? Would silky objects stick to the couch? Would silky objects stick to the wall? What if the materials were wet? Experiment and have some fun!

What can you stick to the back of your couch?

Thursday, July 3, 2014

Doing science with your kids blog

Christopher Danielson has been a reader of this blog since the beginning. He started the Talking Math with Your Kids blog where he discusses how he and his young children talk about math. We follow each other on Twitter where he virtually introduced me to Casey Rutherford. Inspired by Talking Math with Your Kids, Casey started the hashtag "#dswyk" which stands for "doing science with your kid(s)," and I promptly joined the #dswyk party. A few days/weeks (I'm oblivious to time at this point in my life, thanks to Miss Baby J) later, he created a blog: Doing Science with Your Kids, and now I'm a contributor.

My first entry is a lesson on sink or float led by my 5-year old boy, J. Does a Duplo sink or float? The answer might surprise you. Click on over to check it out!

I'll still be using this as my main blog and contributing as I can to Doing Science with Your Kids.

Monday, June 16, 2014

Baking soda and vinegar volcanoes via a 5 year old

A few weeks ago, J woke me up from a much needed nap telling me that he wanted to do science. I asked what he wanted to do, and he really wanted to do balloon science, particularly baking soda and vinegar blows up a balloon. Frankly, I wanted to do something else (because though fun, it is a quick experiment that we've done more than once), but we kept the baking soda and vinegar part of the science he wanted to do. I asked him if he wanted to do volcanoes. He gave us an enthusiastic, "YES!"

Being lazy and having a new baby (who at the time was content), I didn't want to spend time looking up the experiment online. We decided to experiment on our own on how much baking soda vs. how much vinegar and the size of the container we were using for the experiment.


Mountainous material for the volcano:
I admit again that I am lazy. J had been given a lot of Play-Doh for a birthday last year, so I'd figure we'd use some up by covering the paper cup in different shades of Play-Doh. I don't want to be crafty at this point in my life, but here is a homemade playdough recipe if you'd like (painted paper mache volcano might be better if you have time to plan ahead and want it to look cool). The Play-Doh got soggy, but held up. We tossed it after we were done though we were thinking of saving it before we started, which is why we only put a small amount of orange and red on our volcano. We remained lazy and just used the Play-Doh container, without any decoration, to test a smaller container. J enjoyed it just as much as the decorated volcano since the "wow" factor is in the interaction between the baking soda and vinegar.


Place volcano in a pan with high sides, or you'll have quite a mess to clean up afterwards.

Amount of baking soda:
We used 1 tablespoon (tbsp) of baking soda as a starting point. We also used 2 tbsp, but 1 was enough to give multiple eruptions with our amount of vinegar, see note below on limiting reagents. We placed the baking soda in the cup first.


Note: We started with about 1/2 of a box of leftover old baking soda from the last time we switched it in the fridge, so there was plenty to experiment with.

Amount of vinegar:
We had a little under 1/2 gallon of vinegar to experiment with though we initially weren't planning to use it all. An adult poured it into a small 8 oz cup for J to handle. You definitely don't need a 1/2 gallon of vinegar, but we buy it by the gallon because it's cheaper and we can use it in impromptu experiments.

Size of container:
It turns out that if you have limited resources (ie. minimal amounts of mountainous materials, baking soda, or vinegar), go with a smaller container. If not, the bigger container works just fine.


Experiment:
Let your little one lead. We let J measure the baking soda and gave him the vinegar in a kid size cup. He knew what to do from other baking soda/vinegar experiments. I thought the reaction was over after the first pass of vinegar. J's curiosity lead to the discovery that 1 tbsp of baking soda can lead to multiple "eruptions" (reactions).


Notes:
With 1 tbsp of baking soda, the unmeasured vinegar (under 8 oz) poured in spurts seemed to be the limiting reagent. We poured more vinegar, and the reaction kept going. This is an advance concept for preschoolers, but you can definitely point it out and see if they follow.

After experiment free play:
I'm big on letting my 5 year old continue to play once the experiment is over. This experiment resulted in a sensory bin since there was a big glup of baking soda in basically water. However, when he transferred his pile of baking soda from one part of the tray too another, he got a sizzle. There was still a reaction left!


And apologies for the shaking camera. I was helping J with the experiment, and John was juggling the camera and this cute nugget:


She liked the volcanoes too. Well, at least she didn't fuss.

Have you experimented with baking soda and vinegar volcanoes? How did you model the volcano?

Friday, May 2, 2014

Do plants grow without leaves?

We recently had a rodent eat all of the leaves off of our cucumber plants:


My husband had high hopes that they would recover. I, on the other hand, was not so optimistic and asked that we buy some more and replant. (my hypotheses: the plants wouldn't survive)

We replanted, but we left the chewed plants for an experiment to see what would happen. We also had a cherry tomato plant that had its leaves only partially eaten. We let that one be without replanting.

The result?

A month later both chewed cucumber plants were completely dead.

Why?

Leaves play an essential role in the process of photosynthesis - the process plants use to convert sunlight into energy. I like to think of leaves as mini solar panels, using sunlight to make energy. Without leaves the plant has very little to create the energy needed for the plants to grow bigger.

What about the half-chewed tomato plant?

The tomato plant was only partially eaten by the rodent, meaning that the rodent left some parts of the leaves. The plant has recovered and is flourishing.

What experiment can you do at home?

You don't need a garden or bigger/expensive plants. Beans grow relatively fast from seeds. Plant 3 different beans in jars/cups. When they are big enough to have leaves, break all the leaves completely off of one, break the leaves half way off in one, and leave one to grow normally. Compare how they grow after that.

Personal lessons learned:

We made a crop cage for our garden before planting the new bunch of cucumbers. The new plants have not been targeted. We might blog about the crop cage in the future, but it needs a few tweaks first.

Saturday, April 5, 2014

Dancing Raisins - a Magic School Bus Experiment

This Dancing Raisins experiment came from our Magic School Bus Science Club kit on solids, liquids, and gases. It involves raisins, tap water, and soda water. Concepts to discuss are density (what sinks, what floats), forces, and buoyancy.

We started out placing raisins in tap water. They did nothing. Note that I left the sound on this video. J wanted to take over and conduct his own sink/float experiment.


We didn't have soda water, but the kit came with an alkaseltzer tablet. We tried it. It was supposed to be for another experiment in the packet that we ended up observing/conducting on our own. It wasn't the best. The raisins bounced up and down a few times, but mainly it smelled as the gases were released from the tablet. J really didn't like the smell. Yay, science.

We put the experiment on hold while we walked down the street for dinner. The restaurant happened to have soda water available, so we took a cup of it home. We weren't 100% sure the carbonation would survive the 10 minute walk, but we repeated the experiment using soda water. It worked! This is what happened, note I left sound on for J's commentary:


So what happens is the gases in the soda water get stuck in the crevices of the raisins and give the raisins enough air (forces/buoyancy) to float to the top of the water. Once at the top, some bubbles pop and go into the air, and the raisin sinks back down to the bottom. Pretty neat, huh?

Notes: 
I paid for the Magic School Bus Science Club Kits and have no affiliation with them.

I'm taking a brief break from the blog to focus on my family. I'm sure we'll have tons of scientific discussions. I'll try to post some insights to our Facebook Page or Twitter as they come and catch up on the blog once I come up for air.

Tuesday, March 18, 2014

Garden Disaster

I guess this is our punishment for 80 degree weather in March. Something ate all of our cucumber leaves!!


This makes us all sad (J was on the verge of tears upon discovering this scene today). We'll wait a few days and see what the plants will do. I'm thinking we'd have to invest in new cucumber plants (it is early in the season)...or maybe steer clear of cucumbers this year. It was a hot item for creek rodents last year (I never saw what was eating our plants, but I have seen raccoon and squirrels in the neighborhood). We didn't need to net the plants this early before. The problem with netting/covers is that it doesn't allow for J to freely pick his produce. The netting was more annoying than anything else. The rodents chewed through it, and the cucumber plants grew through it.

I just bought a decoy owl and some Deer Off spray that should arrive by Thursday. We might have to still devise some sort of cage/cover. Sigh.

Any tips for garden disaster recovery?

Saturday, March 15, 2014

Gardening 2014

After a month of much needed rain (and we still need more to not see sky-high produce costs this summer), we've been blessed with sunshine and weather in the 70s - perfect gardening weather. Being almost 9 months pregnant, I debated planting a garden this year. It's hard to get up and down from the hard ground at this point and keeping another living thing alive during the summer might be overwhelming with a newborn. However, the motivating factors won: fresh homegrown produce that tastes better than what you can buy from the store and J's excitement for eating said produce. Plus, it wasn't going to be as big of an investment this year since we had made big planter purchases over the last two years.

Tackling concern #1, getting the garden started at almost 9 mo pregnant:

J is almost 5. He's become quite the helper and was super eager to help us with all steps off setting up the garden. This was probably our most successful garden shopping experience yet with him. He wanted to buy almost every sprout at the gardening store (because of our limited window space, we start most of our garden with store bought sprouts). We settled on lemon cucumbers, regular cucumbers, and cherry tomato plants, and we are germinating bell peppers and green beans. 

Here's J helping us plant the tomato plant:


He then staked the tomato plant since tomato plants like to have support to aid their growth.


Then he helped water all of the plants.


Our strawberries survived another winter and already have buds! This surprised us because we're in the middle of the worst drought in CA record keeping (and we basically ignored them all winter). This is 3 years in a row for our strawberry plants - definitely a great investment for us. I still love our strawberry planter (affiliate link).


We're trying cucumbers again this year. They were really successful last year, maybe even too successful because we saw how many cucumbers were growing, but they would disappear before we'd get to pick them (it was a hot summer last year and they are mainly water - the neighborhood critters got to them before we could). Going into gardening cucumbers last year, we didn't know/realize that they were a climbing plant, so this year, we spread them out a little more and gave them a cage to grow on. I hope keeping them off the ground will keep some of the critters away. We'll probably end up netting them again.


We just planted the green beans and bell pepper seeds. They are currently in terra cotta pots in our window sill. I'm hoping they'll sprout in time to get them in planters before the baby comes. If not, it'll be shortly thereafter.


As for concern #2, keeping other living things alive:

I think I can manage a garden, especially since I'm on maternity leave for a few months. The garden is right outside our apartment. If we had invested in a community garden plot, motivation to get out and about would be harder to find.


We're focusing on planting things that can be harvested all summer long. I love seeing J pull off green beans and strawberries, wash them with the garden hose, and pop them in his mouth. We haven't had good luck with our larger tomato plants, but we've done alright with cherry tomatoes in the ground in the past. I'm hoping we can do alright with this year's cherry tomatoes in a pot to give J the satisfaction of eating them all summer long.

If you have any tips to get the most from our plants, I'd love to hear them. How do you deal with critters? Ours are mammalian (raccoon and squirrels). How often do you replenish your soil? Do you use any plant food? Do your kids eat more veggies when they help in the growing process?

Friday, March 14, 2014

Investigating Pi for Preschoolers

Happy Pi Day to you!! Today, I'm participating in my first ever Blog Hop. Some math loving mommy bloggers and I have all written posts about Pi and/or Pi Day! Please, check the links at the bottom of the post for more fun things to do on Pi Day. Thanks for stopping by Nerdy Science's feature, Investigating Pi for Preschoolers:

While making our Pi Day Posters, we decided it would be a good time to investigate Pi: the ratio of the circumference of the circle to its diameter.

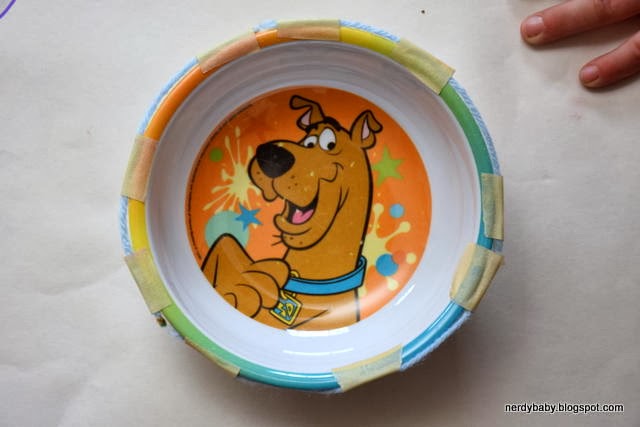
We traced a circular bowl on the paper:


Then we measured the diameter of the circle, three different times, using yarn. What is the diameter of a circle? It's a line that cuts the circle in half, which you can do many (well, infinite) ways. We chose to be satisfied with measuring the diameter three ways. We cut the length of the diameter out of string/yarn:


We compared the length of the strings to see if the diameters were the same:


The diameters are about the same length (we live in an imperfect world and yarn is stretchy and was probably cut at different tensions - and the circle was traced by a four year old).

We then thought it would be easiest to tape the yarn to the outside of the bowl that was traced, along its circumference. We asked J if one piece of yarn, that we had cut to the length of the diameter, would fit all the way around the bowl. His hypothesis: "No!"

He was correct (the string is hard to see in the picture, so we marked the beginning and end with markers, the string is going from purple to red):


Then we asked about 2 pieces of yarn we had cut to the length of the diameter. He wasn't as certain, but he answered "No," again. He was correct, again (the string is going from red to purple, sorry for the inconsistency):


It took all three strings to make it around the bowl (the yarn we used was pretty stretchy and the actual circumference of the bowl was a tad bit smaller than what we had traced).


So how many strings, measured to the length of the circle's diameter, did it take to go around the bowl? About 3! This is approximating Pi! The actual ratio of circumference to diameter length is an irrational number that goes on forever and ever. It starts out 3.14159 and keeps going. For our 4 year old, seeing that Pi is about 3 made this activity a success!


This ratio, Pi, is used to calculate many things like angles and circular motion, but it takes a lot of math to get into that fun stuff. The most common uses of Pi are found in geometry, like finding the: circumference of a circle = Pi*diameter; area of a circle = Pi*(diameter/2)^2, and the volume of a sphere = 4/3*Pi*(diameter/2)^3.

As for our Pi treat and holiday photo, tune in tomorrow to see our creation and annual family Pi Day Photo.


Blog Hop Time! Check out what these fantastic educators are doing about Pi and Pi Day!


We Love Math blog hop is hosted by 

Saturday, March 8, 2014

Pi Day Posters

Let me tell you how excited I am about March 2014. Basically, it's Pi MONTH! 3.14, get it? Why wait till March 14 (also 3.14, in the US, at least) to celebrate? I decided we should get into the nerdy spirit a little early and start decorating.


Pi is the ratio of the circumference of the circle to its diameter. I thought we can have art with circles and numbers to hang above our couch for Pi Day.

Here's what we did:

I convinced J to help me lay out some circular items we had around the house (it helps that I have a lid collection for unknown special occasions). We used bowls, lids, bottle caps, and a tape roll and arranged them on some craft paper. Then we traced each circular item. J was really excited to trace the double circles of the tape.

J is almost 5. He's getting really good at writing his letters and numbers, so I let him write Happy Pi Day and as many numbers of Pi that he had the patience to write. He added a heart (though it looks like a pie with a slice taken out) and "I Love You Pi."


Friday is the official annual Pi Day (March 14 or 3.14...). I will be participating in my first Blog Hop, where a group of bloggers write their own posts about a particular topics and link to other blogs writing about the same topic. Friday's topic: Pi Day!! Make sure to come back for a geometry lesson on circles!

Happy Pi Month to you!

Related Post:

Sunday, March 2, 2014

Bones!


We've had a rough week. Last Thursday, J decided to grab the inside of a restroom door as it was being shut, breaking the tip of his finger and turning his finger nail completely black almost immediately. The doctors say it should be back to normal in the next four weeks. Though it's sad to see my child in pain, this incidence got me thinking about how much I love learning about the body and how it continues to motivate me in my current research.

The human body amazes me! And, guess what? We're still learning about us! Research is awesome.

Do you know how many bones are in our body? 206, at least for adults. Babies are born with more, but they end up getting fused/grow together as they age. One of the reasons babies have more bones is to make them more squishable to help with the birthing process.

Did you know that astronauts lose bone when they are in space? The same goes for people who are bed-ridden for lengthy amounts of time. Bone is this amazing material that responds to load/weight/forces that you apply to it. If you don't use it, you lose it! Fun studies have shown that the opposite is also true. Tennis players tend to have thicker forearm bones in their dominant arm when compared to the other arm.

More research: One of my favorite grad school classes, Orthopaedic Bioengineering, was taught by Dr. Dennis Carter. He co-authored Skeletal Function and Form: Mechanobiology of Skeletal Development, Aging, and Regeneration (affiliate link) with Dr. Gary Beaupre. Both gentlemen have spent their research careers studying the formation and redevelopment of bones and other structural materials in our bodies and have shared the information they've learned with us through this book.


Since we've been preoccupied with J's finger and getting ready for Baby Sister (who will be here in six short weeks), I thought it would be a good time to do the Magic School Bus kit on the Body and Bones, but we've already done the age appropriate experiments in some form or another. Here's a flashback to some of the fun with the human body we've had:

Sunday, February 16, 2014

Mathematical Dice Games


J spent a day sick at home last week. It was a minor illness, so he was very antsy about being inside all day. He pulled out his dice to pass the time. J's great aunt had given him the Tenzi Game (affiliate link) over the summer. We haven't played it the way it's supposed to be played (getting all 10 dice to show the same number, which sounds like some super Yahtzee game), but we now have 40 dice to play with however we want. This is heaven for this math mama! Let me tell you some fun math games we've played with them and how we plan to continue to grow and develop mathematically with the dice.

We started out with each person having their own color of dice, so we can easily distinguish who rolled what.

The Bigger Number Wins!

J actually came up with this game on his own. We started out with one dice (aka. die) each. We rolled the dice, and J first counted the dots on each die and told me which die had the most dots. As we played more, I encouraged J to make his decisions quicker, without counting.

This game is great for older toddlers (who won't shove dice in orifices that they shouldn't be in) and preschoolers to understand the concept of greater than/less than.


Addition: The Bigger Number Wins!

The next game included two dice each. Again, having different color dice is wonderful for determining what numbers belong to each person.

We rolled the dice, and J added up the dots on everyone's rolls. Whoever rolled the biggest number wins! J also ranked who came in second, third, and last. We also increased the frequency of rolls and decreased the amount of time between each roll as we progressed. This challenged our 4.5 year old to make quicker decisions and encouraged more mental math rather than counting dots. In our picture example, the yellow dice wins with 11, green comes in second with 10, white is third with 9, and blue is last with 7.


For older kids: This game can be adapted to use more dice for a greater challenge.


Subtraction: The Smaller Number Wins!

We haven't played this game yet. I imagine it going something like this:

Each player gets two dice of the same color. Everyone rolls their dice and each person's smallest number rolled is subtracted from the larger number rolled. Whoever gets the smallest number wins! In our picture example above, we have a tie for first: yellow and blue both have 1. Green comes in next with 2, and white loses with 3.

For older kids: This can also be a two player game with two dice of different colors each. Pick a color to always subtract from the other color. Note that this might give you negative numbers! The smallest number still wins.


More Math Fun with Dice!


During his childhood, my husband was given a dice game by his grandpa (he has no idea of what it is called). After his old game broke, John went on to design one for himself on his 3-D printer and uploaded it to Thingiverse (to share with other nerdy people). The goal of the game is to use mathematical operations (you know, please excuse my dear Aunt Sally's loud radio - the mathematical order on how you're supposed to solve complex problems parentheses, exponents, multiplication, division, addition, and subtraction from left to right) on the 5 white dice in order to get the result of the two black dice added together (so on the picture above: how would 2, 3, 3, 3, 6 make 42?). If you want more details on the game or want to print one of your own, visit the Dice Game Thingiverse page. This game is also great for older kids.

Do you have any fun math games you play with dice?

Saturday, February 8, 2014

Scientific observations of different balloons

I promised J some science after naptime. I decided to nap too instead of prepare a science lesson. He awoke pretty excited, so I asked him what kind of science he wanted to do. Since he was close to our stored, small helium tank while waking me up, he pulled that out. Not wanting to repeat the hover balloon lesson, I had to think of something else with balloons on the fly (which is harder to do in a sleepy stupor and with preggo brain). It's also been bothering me from the scientific standpoint that a post is going around Pinterest saying that our baking soda + vinegar reaction blowing up a balloon is a good alternative to helium.

I decided that we should play with the weight of the balloons and that this could be a good lesson for J in making hypotheses (educated guesses about what he thinks will happen when conducting the experiment).

Objectives:
*To determine what three different balloons will do: sink or float. The three balloons would be filled with 1. air (blown up with our mouths); 2. helium; 3. carbon dioxide (CO2) which is the gas product of the chemical reaction between baking soda and vinegar.
*To determine which gas is heavier: air, helium, or carbon dioxide.

J's Hypotheses:
*Hypothesis 1:
     1. Air will sink.
     2. Helium will float.
     3. Carbon dioxide will sink.
*Hypothesis 2:
     1. Air is heavier than carbon dioxide.
     2. Helium is lighter than air.

Experiment:
*Fill 1 balloon with air from your mouth.
*Fill (or obtain) 1 balloon with helium.
*Conduct the baking soda + vinegar reaction (see link above) and tie off the balloon once it's full of carbon dioxide gas.
*Hypothesize about what the balloon will do when dropped: sink or float?
*Drop each balloon and observe what happened.
*Make conclusions on your observations: where your guesses correct?
*Now using what you just learned from your balloon dropping observations, make hypotheses about which balloon is heavier or lighter.
*Weigh the balloons on the scale/balance (like the one we used in our balance game), or create your own balance from office supplies.

Results:
*Helium floated.
*Air balloon sank.
*Carbon dioxide balloon sank.

*Air balloon is heavier than helium:


*Carbon dioxide balloon is barely heavier than the air balloon, but it is also smaller.


*The air balloon is slightly heavier than a deflated balloon (but not by much).


Discussion:
*There is a difference in balloon volume between the air and the carbon dioxide. We didn't have a large enough reaction to really blow the balloon up to the same size as the one we blew up with our mouth. Even with a smaller balloon volume, the carbon dioxide balloon is heavier than the balloon we filled up with our air.
*It's also important to note that carbon dioxide is a product of what we exhale when we breathe (or blow up a balloon). However, there are a lot of other gases mixed in with the carbon dioxide.
*We couldn't figure out a good way to measure the weight of the helium, so we tied it to the scale, which immediately raised the scale on the side of the helium balloon, but helium is lighter than air.

Some other fun we had:
*We played, what can we tie the helium balloon to in order to keep it from floating to the ceiling.
     - We ended up using a Cootie Bug.


After the experiment, J thought it would be fun to launch balloons with our balance/scale.
     - I always recommend well-supervised free play time after experiments.
     - Kids are awesome at finding fun new ways to explore their world.
     - Don't forget to explain what's happening as they make new discoveries.

Sunday, February 2, 2014

The Guessing Game - Practicing Descriptive Words

Lately, J has been playing this game where he pulls out everything he owns and hides it behind his back. He then makes us guess what it is by his clues. Luckily, his clues have gotten better as the game has progressed.

This is a great game for beginning to use descriptive words, which are useful in the scientific world. 

These words can describe:
  • what the object looks like.
    • Is it big, small, colorful, etc.?
  • the shape of the object.
    • Is it round, oval, square, rectangular, etc.?
  • what the object feels like.
    • Is it smooth, slimy, bumpy, etc.?
  • what the object is used for.
    • Is it used for cooking, cleaning, fun, a specific purpose?
  • what letter the object begins with.
  • what sounds the object makes.
  • if it can be used more than once.

My favorite clues J has come up with:
  • It is used to hit a baseball. (Baseball Bat)
  • I wear this on my head to protect my eyes from the sun. (Baseball cap)
  • It begins with an M and is used to make cold food warm. (cardboard microwave - this one threw gma off during a Skype guessing game session)

One that threw us off:


Clues:
  • He said there was something behind his back.
  • He was not holding it.
  • It's blue.

Yay for static electricity!

Seriously, this game has killed much time in our household. It's usually an impromptu game due to boredom, but we love to play it on Skype with his grandparents. It's fun to see him improve on his descriptions too.

Wednesday, January 22, 2014

Happy 3rd Blogiversary to Nerdy Science!

It's always fun to do an annual reflection on how things are going with this blog and my goals. Thanks for joining me on our science adventures.

My goals have always been to do simple, easy science at home and making science part of everyday life/conversation.


My goals from last year and how I met them:

- I want to be still blogging weekly about the wonderful scientific world around us. 
**Blogging weekly has been a challenge this year. We're having a new nerdy addition joining our family in April, and though I've been blessed with no morning sickness, pregnancy is no walk in the park. We talk about math and science all of the time in our house. Translating interesting and thoughtful lessons to the blog became the bottleneck.

- I want to continue Science Saturdays in the Park, hopefully starting back in February or March. 
**Science Saturdays have been a real gem in my life. I have so much fun sharing science and conversing with families who have similar passions. We had one per month from March - October (except May), with many new lessons including: Squishy Circuits, Magnet Detectives, and Ice Cream in a Bag to name a few. Every time we pass a park where we've had a lesson, J states that's a park for science and which science we've done there.

- As J grows, I want to establish worksheets, puzzles, and games that keep his mind active and help him learn new science and math concepts. These would be shared with my blog followers. 
**I have not been able to much progress on this goal. I did make a worksheet for the M&M math for preschoolers.

- I want to learn how to draw to help with the worksheets and activities listed above. 
**I still suck at drawing anything.

- I hope to have a website to go along with this blog. 
**Ya, this goal was supposed to be completed by June 2012. I have all of these ideas of what I want it to look like, how I'd like it to function, and the features I'd like it to have. Unfortunately, the little html knowledge I have will not translate into a website that I can be proud of. I will maintain the domain name with hopes of one day having a website.

- I hope to have time to join the bigger community of Mommy Bloggers. There's so much we can learn from each other.
**Thanks to suggestions from my friend MaryAnne of Mamasmiles, I joined the Kid Blogger Network and have connected with many other parent bloggers.


2013 highlights


For 2014, my goals are:
  • Give birth to a healthy baby girl.
  • Show Miss Baby J the world through science, hoping to add on to my baby science tag.
    • I secretly hope J gets in on the lesson creations for Miss Baby J. I just love how his mind works! And right now, there is nothing sweeter than him reading to the baby and explaining the pictures and what big words mean.
  • To continue bringing simple, fun science to young children through Science Saturdays and community outreach programs.
  • Develop some fun supplemental science and math worksheets.
  • Blog more about science that does not need set-up/clean-up time: how science in our everyday life and how to think like a scientist.
  • Continue to develop and grow the relationships that are formed by networking.

Related Posts, Previous Year's Reflections: