We made baggie ice cream again for dessert tonight (it's been a warm weekend and cold ice cream tastes so good).
My new thermometer (affiliate link) arrived last week, so I thought I'd report on the temperatures of the experiment.
The rock salt and the ice mixture started out around 31.7 degrees Fahrenheit (freezing temperature of water is 32 degrees F, so the salt was already starting to work). After 10 minutes of play, the temperature of the salt/ice mixture reached 18.0 degrees F. The ice/salt mixture was so cold that it froze the condensation that was coming off of the bag! Salt does lower the temperature of ice.
I didn't measure the temperature of the ice cream mixture because I didn't want to wash the probe before (lazy, I know). I'd recommend washing your thermometer after the salt/ice mixture measurements as salt can cause damage to some materials.

Everyday science for families with young children.
Sunday, June 30, 2013
Wednesday, June 26, 2013
Baggie Ice Cream!
We started off the week making ice cream in a ball, but as far as Science Saturdays go, ice cream made with the ball is not very feasible on a larger scale since it takes over 20 minutes and the balls are expensive.
Instead, we took some knowledge from the recipe book of the ice cream ball (the heavier the cream, the faster it'll freeze) and combined it with this ice cream science activity from 3M. The ball recommended heavy cream for the fastest freeze time, and the 3M activity says 1 cup of milk or half and half would work. Personally, I didn't like the taste of all cream ice cream, and all cream would get expensive on the larger scale. I tried 50/50 this time, but I think I'll still like the taste better with even less cream (I'm a lighter ice cream gal) - so even more experimenting here before Science Saturday next month.
J's a little young to understand the lowering of the freezing point of water using salt. It doesn't help that we live in a place where it doesn't freeze, so we don't need to salt our sidewalks during winter time. I also wanted a 10 minute maximum for attention needed. The mixing of ingredients and change of matter is scientific enough for my four year old, and the fact that he gets ice cream at the end of it kept his attention fairly well (in fact, it made him pretty hyper).
Ice Cream Recipe (adapted from 3M activity)
1/2 cup heavy whipping cream
1/2 cup milk
1/2 tsp vanilla
2 T sugar
-Combine all ingredients into a quart sized zipped baggie. Zip the baggie, letting out all possible air.
-3M says to double bag the ice cream so we did (again with no air bubbles since air acts as insulation). I'm sure this is just so the ice doesn't accidentally puncture the ice cream mixture. I'll take extra precaution to ensure non-watery+salty ice cream.
-Place ice cream in a gallon sized zipped baggie full of 4 cups of crushed ice and 1/2 cup of rock salt. Zip the gallon baggie, and 3M says to gently shake. J got a little excited with the shaking that by no means was it gentle.
We set a timer for 10 minutes and started shaking the baggie around on squishing/mixing the ice cream with our hands. However, after a minute or two, the ice + salt got too cold for our sensitive hands. Instead of reaching for our "winter gloves" which I just thought about, John grabbed a towel and wrapped the ice cream + ice in the towel. We tossed it around that way for a few minutes. We combined it with punching/kneading the baggie through the towel.
The timer dinged after 10 minutes and the ice cream was perfect! It was enough to even split between J and me. Despite our cold hands setback, this method was actually easier and less to clean up than the ice cream ball. All we had to do was toss the bags - no dishes other than the few measuring devices and the bowls we transferred the ice cream to. You could enjoy the ice cream right out of the baggie instead of bowls.

Discussion for younger kids:
*What ingredients are you mixing together? What if you vary the ingredients (ie the ratio of milk to cream or additives like cookie pieces or chocolate chips)? Do you think it will work the same? How do you think it will taste?
*Is the ice cream mixture solid, liquid, or gas when you mix it together? What about when it becomes ice cream?
*Is ice hot or cold? When we stick something in ice does it get hotter or colder? What about the ice; does it get hotter or colder?
*What happens if we just stick the ice cream mixture in the freezer? How long will it take to freeze? Does it taste the same as the ice cream you made in your baggie?
Add on discussion points for older kids:
*What did the salt do to the ice? Why did the salt melt the ice?
*Get a thermometer and measure the temperature of the ice cream mixture, the ice before adding salt, the ice immediately after adding ice, the ice cream after it freezes, the ice + salt mixture after the experiment is over. What did you observe? What's the freezing point of water? Is the ice + salt mixture below the freezing point of water?
All in all, baggie ice cream was a success, and I do think ice cream making would be feasible for the next Science Saturday. Tentatively, we're scheduling it for Saturday, July 13th (of course we depend on weather and family wellness). Shoot me an email if you want specific details. Hope to see you then!
Related Posts:
*Baggie ice cream follow-up: temperatures of ice+salt.
*Science Saturday in the park: ingredients needed for 30 kids.
*Make ice cream in a ball
Instead, we took some knowledge from the recipe book of the ice cream ball (the heavier the cream, the faster it'll freeze) and combined it with this ice cream science activity from 3M. The ball recommended heavy cream for the fastest freeze time, and the 3M activity says 1 cup of milk or half and half would work. Personally, I didn't like the taste of all cream ice cream, and all cream would get expensive on the larger scale. I tried 50/50 this time, but I think I'll still like the taste better with even less cream (I'm a lighter ice cream gal) - so even more experimenting here before Science Saturday next month.
J's a little young to understand the lowering of the freezing point of water using salt. It doesn't help that we live in a place where it doesn't freeze, so we don't need to salt our sidewalks during winter time. I also wanted a 10 minute maximum for attention needed. The mixing of ingredients and change of matter is scientific enough for my four year old, and the fact that he gets ice cream at the end of it kept his attention fairly well (in fact, it made him pretty hyper).
Ice Cream Recipe (adapted from 3M activity)
1/2 cup heavy whipping cream
1/2 cup milk
1/2 tsp vanilla
2 T sugar
-Combine all ingredients into a quart sized zipped baggie. Zip the baggie, letting out all possible air.
-3M says to double bag the ice cream so we did (again with no air bubbles since air acts as insulation). I'm sure this is just so the ice doesn't accidentally puncture the ice cream mixture. I'll take extra precaution to ensure non-watery+salty ice cream.
-Place ice cream in a gallon sized zipped baggie full of 4 cups of crushed ice and 1/2 cup of rock salt. Zip the gallon baggie, and 3M says to gently shake. J got a little excited with the shaking that by no means was it gentle.
We set a timer for 10 minutes and started shaking the baggie around on squishing/mixing the ice cream with our hands. However, after a minute or two, the ice + salt got too cold for our sensitive hands. Instead of reaching for our "winter gloves" which I just thought about, John grabbed a towel and wrapped the ice cream + ice in the towel. We tossed it around that way for a few minutes. We combined it with punching/kneading the baggie through the towel.
The timer dinged after 10 minutes and the ice cream was perfect! It was enough to even split between J and me. Despite our cold hands setback, this method was actually easier and less to clean up than the ice cream ball. All we had to do was toss the bags - no dishes other than the few measuring devices and the bowls we transferred the ice cream to. You could enjoy the ice cream right out of the baggie instead of bowls.

 |
| The seal of approval |
 |
| One satisfied scientist |
Discussion for younger kids:
*What ingredients are you mixing together? What if you vary the ingredients (ie the ratio of milk to cream or additives like cookie pieces or chocolate chips)? Do you think it will work the same? How do you think it will taste?
*Is the ice cream mixture solid, liquid, or gas when you mix it together? What about when it becomes ice cream?
*Is ice hot or cold? When we stick something in ice does it get hotter or colder? What about the ice; does it get hotter or colder?
*What happens if we just stick the ice cream mixture in the freezer? How long will it take to freeze? Does it taste the same as the ice cream you made in your baggie?
Add on discussion points for older kids:
*What did the salt do to the ice? Why did the salt melt the ice?
*Get a thermometer and measure the temperature of the ice cream mixture, the ice before adding salt, the ice immediately after adding ice, the ice cream after it freezes, the ice + salt mixture after the experiment is over. What did you observe? What's the freezing point of water? Is the ice + salt mixture below the freezing point of water?
All in all, baggie ice cream was a success, and I do think ice cream making would be feasible for the next Science Saturday. Tentatively, we're scheduling it for Saturday, July 13th (of course we depend on weather and family wellness). Shoot me an email if you want specific details. Hope to see you then!
Related Posts:
*Baggie ice cream follow-up: temperatures of ice+salt.
*Science Saturday in the park: ingredients needed for 30 kids.
*Make ice cream in a ball
Sunday, June 23, 2013
Ice Cream Making - It's Science!
This was my second year with BioX Kids' Day, and both years, I saw many kids having fun with the YayLabs! ice cream ball in the chemistry booth nearby. I wanted to try, but the day is so jam packed that there is no breaks for helpers (at least from my experience).
How does ice cream making work? The key is getting the mixture to mix around while surrounded by salt and ice. Salt is a special ingredient that lowers the freezing point of water (ie. it melts the ice to make colder than ice water!!).
I think J's school has made ice cream with the kids, but I wanted to do it on my own with him. I decided to purchase the ice cream ball from Amazon (affiliate link) (as a bday gift to myself - thanks to my bro and sis-in-law).
The ball came with a simple recipe: 1 pint of cream (we used heavy whipping cream), 1/3 cup + 2T of sugar, and 1.5 tsp of vanilla.
After filling the ball portion with crushed ice and rock salt (Safeway had a box of special ice cream making salt for $0.99 - it's not food grade, but it's great to use in experiments like this since it won't be directly touching what we'll eat):

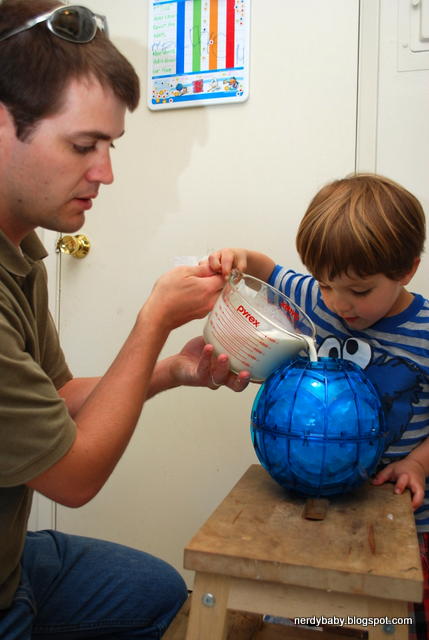
we mixed the ingredients in a separate bowl:


and poured into the ice cream compartment:

Don't forget to seal both compartments!
Then we got to tossing/rolling.


The book that came with the ice cream ball had approximate freeze times for ice cream. The heavier the cream, the faster the freezing time. Since we used the 2nd heaviest cream (heavy whipping cream), we decided 20 minutes would be a good time based on their recommendation.
And this is what we got after 20 minutes of "play":
I was warned by a few parents at the last Science Saturday when brainstorming ideas for the next Science Saturday that ice cream making does take a long time, which is why I'm currently testing the ideas. Really, the ball took 20 minutes and it was soupy (but still good enough to eat as ice cream). Keeping J's attention that long was tough. Plus, it's too expensive to get enough ice cream balls to make it worth while for a Science Saturday event.
However, I'm still determined to make ice cream making work on a larger scale for a Science Saturday event. Tonight, we had much more success just making ice cream in a baggie. I have pictures, video, directions, and activities surrounding baggie ice cream that I'll post later in the week. Stay tuned.
Until then, I hope you are enjoying your summers thus far!
Related Posts:
*Make ice cream in a baggie
How does ice cream making work? The key is getting the mixture to mix around while surrounded by salt and ice. Salt is a special ingredient that lowers the freezing point of water (ie. it melts the ice to make colder than ice water!!).
I think J's school has made ice cream with the kids, but I wanted to do it on my own with him. I decided to purchase the ice cream ball from Amazon (affiliate link) (as a bday gift to myself - thanks to my bro and sis-in-law).
The ball came with a simple recipe: 1 pint of cream (we used heavy whipping cream), 1/3 cup + 2T of sugar, and 1.5 tsp of vanilla.
After filling the ball portion with crushed ice and rock salt (Safeway had a box of special ice cream making salt for $0.99 - it's not food grade, but it's great to use in experiments like this since it won't be directly touching what we'll eat):

we mixed the ingredients in a separate bowl:


and poured into the ice cream compartment:
Don't forget to seal both compartments!
Then we got to tossing/rolling.


The book that came with the ice cream ball had approximate freeze times for ice cream. The heavier the cream, the faster the freezing time. Since we used the 2nd heaviest cream (heavy whipping cream), we decided 20 minutes would be a good time based on their recommendation.
And this is what we got after 20 minutes of "play":
 |
| A little soupy |
I was warned by a few parents at the last Science Saturday when brainstorming ideas for the next Science Saturday that ice cream making does take a long time, which is why I'm currently testing the ideas. Really, the ball took 20 minutes and it was soupy (but still good enough to eat as ice cream). Keeping J's attention that long was tough. Plus, it's too expensive to get enough ice cream balls to make it worth while for a Science Saturday event.
However, I'm still determined to make ice cream making work on a larger scale for a Science Saturday event. Tonight, we had much more success just making ice cream in a baggie. I have pictures, video, directions, and activities surrounding baggie ice cream that I'll post later in the week. Stay tuned.
Until then, I hope you are enjoying your summers thus far!
Related Posts:
*Make ice cream in a baggie
Wednesday, June 19, 2013
Math Land Barbie
I'm a nerd. I've always been. I was forced to clean out my parent's house back in March. Since I'm the only one in my family with a kid of my own, I "inherited" all of the board games. Included in the games was one I only semi-remember making in 11th grade trigonometry/pre-calculus. I'm pretty sure it was an assignment though looking back at it, I went waaaaay overboard.
A friend gave me the Dream Date Barbie board game for my 10th bday. It barely got used. When we got this assignment, I thought it would be fun to have something smart related to Barbie. I was willing to sacrifice the board game for the math assignment. I combined it with a new version of Candy Land (which retails under $10) to make the one and only Math Land Barbie.

I used the Barbie and Ken pieces and pasted the Barbie themed tiles over the Candy Land graphics.

All of the Candy Land cards have word problems written on them. The double color cards have double problem sets. I believe they were color coded based on level of problem solving difficulty. I'm sad to admit that some of the questions will need references in order to solve again (luckily there's an answer key, with work shown, that comes with the game!! Time to relearn up through trig/pre-calc math).

Anyone up for a math challenge? Maybe we can play virtually. Otherwise, I'm considering giving the to my littlest bro-in-law who will be majoring in math in the fall for some nerdy dorm fun at college.
A special shout-out goes to Mrs. E. for the fun assignment and math memories.
Sunday, June 16, 2013
Science Saturday: Stomp Rockets Revisited
Stomp rockets was one of the more successful Science Saturdays last year, so I thought it would be fun to revisit again this year. We had a few repeat visitors who wanted to do stomp rockets again, but we also had a lot of fun with new friends!
We had 4 store bought stomp rockets (affiliate link) set up for immediate action/reaction gratification. Basically the harder you jumped, the higher/further the rocket flew!

I also set up targets using our space cutouts from our Straw Rocket lesson we also did at last year's event.
Then for those who wanted the extra challenge, we made our own stomp rockets which we launched via the homemade stomp rocket launcher (the directions on how to build the stomp rocket launcher and rockets to fly off of them are found on that link). In short, for the rockets, you roll a piece of construction paper around a pipe of the same size as your launcher. You want it to be tight enough so you don't lose air through the paper gaps, but you also want it to be loose enough to come off of the launcher when you stomp. To close off the paper tube, you want to make a nose cone. I found the easiest way was to fold the corners down and tape it to make a triangle. Then you add wings.
Here's my sample rocket:

We had some interesting wing designs. This one started with cylinder wings:

We had a few request for heart shaped wings, so we tried half hearts:

The paper rockets can fly high! J almost made a basket with his orange rocket using our homemade launcher.
The plastic rockets fly very high and work very well but they are not durable. I'm disappointed in the quality of the plastic rockets that come with the set. I'd like to replace them, but it is actually cheaper to buy whole new sets! It just seems so wasteful. The homemade rockets also launched ok from the store bought launchers. They were a little big since the store bought launcher tube is smaller than the homemade one. We'll have to find something smaller to use to roll the paper rocket if we go solely into paper rocket territory after the plastic ones get too beaten up.
Thanks for all those who spent this beautiful Saturday morning with us. I look forward to the next Science Saturday. We're tentatively thinking the morning of July 13th if you are looking to save the date. If you want more specific details, feel free to email me using the address on the sidebar to the left (<<), and I'll add you to the email list.
Friday, June 14, 2013
BioX Kids Day 2013 - Elbows revisited
I was asked to help with Stanford BioX's Kids Day this year, which happened today!
I met lots of fun families. Thanks to all who stopped by to learn about how your arm works!
Here are some old posts for your reference if your elbow breaks (ouch!) or if you want to do it all by yourself. It's very easy and a wonderful way to learn how muscles move the bones in your body.
Elbow Booth Recap, BioX Kids Day 2012.
Elbow Lesson for High Schoolers (with a little kid adaptation).
Science Saturday Elbow Lesson (intro with moving a rock towards me by pushing on a string).
I love learning about how my body works. I hope you did too.
Tuesday, June 11, 2013
The science lab notebook
Science is really nothing if you can't describe what is happening and what you did to make it happen. All good scientist should keep a lab notebook full of their experiments. It also acts as a diary or journal about all the fun things you did and saw!
J is a little too young to keep one all by himself, but I want lab notebook keeping seem like an easy thing. I also found a super cute composition notebook for under $1 while stocking up for school supplies a year ago. J was thrilled for his new, ice cream covered science notebook.

I introduced the concept to him on the day we planted our garden and did our water density and floating egg experiment. I did the writing, but as I was writing, I was asking him questions and having him fill in the blanks. I drew some diagrams too, and he completed the drawings.
Parts of the notebook:
Front cover: I learned the hard way, after my lab notebook disappeared for a week, that you always want to put your name and if it's really important to you, a telephone number in case someone else finds it. Luckily, my notebook was placed on a ladder in the lab while I was distracted by impromptu visitors. Once found, my name and cell # immediately went on it.
Table of contents: I think for little kids, you're okay skipping this, unless you want a quick way to find what experiments you conducted. Leave a page or two blank in the front of the book and fill out the table of contents as you go. If you do a table of contents, I'd highly recommend numbering your experiment pages as you go.
Experiment pages: Follow the description below for each experiment. Some experiments will be much more elaborate or detailed than others. Some will be very simple. Work with your kid on a format that works for you. I like to ask J a lot of questions to see what he thinks as we go. I write his answers to my questions.
Generalities for notebook keeping: Always write in pen so your entries cannot be altered by you or someone else (falsifying information is never okay as a scientist). If you make a mistake, do not use whiteout or black it out with a marker. A single line through with your initials and date and the correct information written nearby will work. On professional notebooks, you want to sign and date every page. If it's important, like you are inventing something, you also want someone else to sign as a witness. Also, it is important to be neat. If you can't read and interpret your work, how will anybody else know what's going on?
For each experiment follow the format below:
Really, at a young age, simple is better. Here's the example page I worked on with J:

Date and Name of the Experiment
Introduction/Scientific Question: Why do you think what we're doing is important?
Hypothesis: What do you think is going to happen?
Materials and Methods: What did you use to do the experiment? How did you do the experiment? Drawings or pictures of how your experiment looked as it was set-up is very useful in this section.
Results: What happened? Drawings and graphs/charts are useful here too. On the graphics above, I drew the cups, and J drew the eggs (circles).
Discussion: Why did that happen? Was it what you expected/guessed/hypothesized? Can you explain why or why not? Do you have more questions posed by the results of your experiment? What can you do differently next time?
I hope you enjoyed this introduction to scientific notebook keeping. It's now a fun part of our science activities. J asks for his special science notebook all of the time.
Related post:
*Setting up a science fair display.
Subscribe to:
Posts (Atom)