Thursday, May 26, 2011

Magnets

Magnets produce a special field that excites material containing iron (steel is a common material containing iron). When excited, the material wants to stick to the magnet. Or - the magnet sticks to the material (ie. the fridge - good luck moving the massive fridge with the very small magnet).

For this experiment, take a magnet (preferably a free one from restaurant advertisements) and go on a hunt to find where the magnet sticks!


Or just make it stick wherever...


Aw man, that didn't work.


Make sure you record your findings! Any surprising places? The fridge is a given, but my favorite is the dishwasher. What do your findings tell you about the material of those items?

If you get a stronger magnet, you can see what the magnet picks up. Use your imagination for picking out items (think office supplies, tools, stuff with steel). If some of your selections don't work, that's part of the learning process. Make sure your kid knows that some things didn't work and they are of a different material that doesn't have magnetic properties (ie. plastics, ceramics, etc.).

Tuesday, May 24, 2011

You know when...

...you have a nerdy baby when his favorite letter is in the Greek alphabet.

...you are married to a nerd when you get an evening out away from the baby and he examines the serving ware in hopes to determine how it's made (then explains the process while waiting for the food - hey, at least the discussion didn't revolve around the nerdy baby).

...you are a nerd when you explain to your child why popcorn can be eaten almost immediately after putting it in a bowl.

...you are married to a nerd when he steps in and further clarifies your statement about the convection cooling of popcorn.


**I'm trying to record the moments that caused funny looks we've received being a nerdy family out in the public.  I'd be happy to hear your nerdy moments.  Step up and earn your "N" for the day :-).

Tuesday, May 17, 2011

Sink/Float

Go on a scavenger hunt looking for different objects to test if they sink/float.

Some examples:
Rocks
Leaves
Cotton balls
Sponges
Bouncy balls
Small beach balls
Balloons (air and water)
Feathers
Paper (crumpled/not crumpled)
Styrofoam pieces
Various toys (bath or just plain play time)
Water bottles filled with various amounts of liquids

Have three bins/tubs (clear see-through storage bins work well - or clean barf buckets) filled half full of water (to keep the water from overflowing) and label the bins: Sink, Float, Tricky (Both/Depends).

Have your scientist experiment with the objects and place the objects in their respective sink/float bin.

Concepts to discuss:
Density - mass of the object per volume.  More "stuff" in a certain area = dense.  A rock is the best example of something that is dense.  It's not fluffy, there's little/no air pockets in dense rocks.  Something filled with air (like a sponge) is considered less dense.  Dense isn't necessarily "heavy" an example of something that is dense but light would be a bouncy ball.
Buoyancy - when an object floats, it is called buoyant, meaning the weight of the object is being held up by the forces the water puts on the object (in other words, the water hold the object up).
Neutral Buoyancy - Submarines are neutrally buoyant.  They don't sink to the bottom of the ocean, and they also don't float on the top.  It floats in the middle of the water.  Can you make an object neutrally buoyant?  Try experimenting with water bottles filled with various amounts of liquid.  Who doesn't get excited about making your own submarine?

Tuesday, May 10, 2011

Science Party!

A few months ago, ads over there <<== pointed me towards a company that sends scientists to birthday parties.  I knew how much fun special birthdays could be for little kids (I was a party hostess in my younger years), so I was excited to check into it for Lil J.  However, they only are for kids ages 4+ and not easy on the budget.  I decided then that I was going to throw J a science themed second birthday, and it turned out fantastic!  We all had a lot of fun.  I'll break it down for you.

Best idea ever: We had the party in a local park.  I reserved tables ahead so that I wasn't worried about not finding free tables on a potentially busy Saturday in the park.  I also liked the idea of the park since I didn't have to clean my house either before or after.  Cost - depends on your city/county policy.

Activities:
Free play on the playground while all of the guests arrived.

Goo!!  1 box cornstarch + water + food coloring (we used 4 different colors) ~ $1.50.  We used some extra party bowls, spoons, and cups.  Good gooey fun for ~7-10 kids!


Bottle Rockets!!  Some PVC pipes and fittings from local hardware store ~$10 (but you could save for future use make this cost more reasonable) + 4 bottles of Diet Coke for $5 (not the best deal out there, but I wasn't going to "shop around") + water + bike pump (hopefully, you have one of these on hand - or could borrow one from a neighbor).  And, please, do not launch bottle rockets unless people (especially the kids) are more than ten feet away from the launcher.

Big and Lil J launching the rockets

Our guests gathered at a distance to watch the rockets launch.  Surprisingly, they all sat very, very still and were well behaved.  Though they stayed put, they squealed with delight each time a rocket took off.  We had two little boys (J and his best friend) who got the biggest kick out of running to retrieve the fallen bottles.
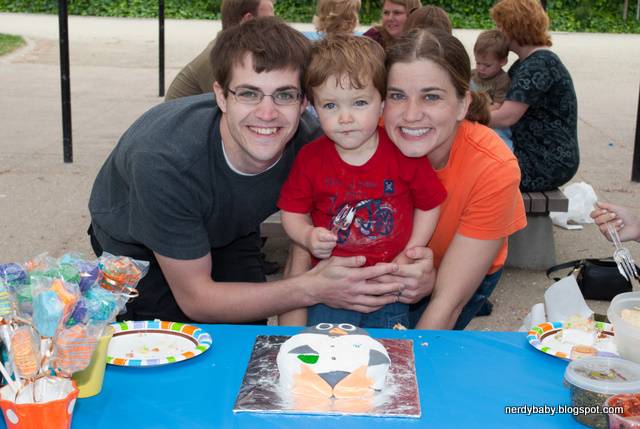


The Cake:


Dr. Penguin, PhD. - 1 box Funfetti cake + Fondant (1 bag mini marshmallows + 0.75 bag powder sugar + some vegetable shortening + food coloring) + buttercream frosting + 2 hours of time (that's the most difficult part).  Yes, I use box cake - these are two year olds.  There were no complaints.

Our Little Scientist
(Grandma made J his own lab coat!)

Optional Party Favors:
Colored Safety Goggles - this was more for fun than safety.  You can search the web for "Child Goggles" and find your favorite.
Disposable Lab Coats - though cornstarch is water soluble, we decided to give these to our guests to protect their clothing - and make them look like mini scientists.
Lab clipboards - we found mini clipboards and a bag of pencils in the $1 aisle at Target.  I cut computer paper in half, and voila, a fun place to make science notes.

Party On!

Sunday, May 8, 2011

Nerdy Birthday Cake

We celebrated J's 2nd birthday this weekend with friends and family. I'll give you a run-down of everything we did later in the week in case you want to throw your own science party for your youngin'. Trust me, we all had a lot of fun!

In the meantime, I'll show you our nerdy cake, a scientist penguin, fondly named "Dr. Penguin" by one of the kids.  It was a collaborative effort between my husband and me.

Dr. Penguin

Family shot in front of the nerdy cake
In case you want it, marshmallow fondant is super easy to make, just melt down marshmallows and mix in almost a full bag of powder sugar.  Here's a good description of the marshmallow fondant recipe.  This is also fun for the kids to play with and eat!  I'm all for cooking science!

Tuesday, May 3, 2011

Goo!!!


We're planning J's birthday party for this weekend. We decided to do a test-run on one of the activities, Goo! Seeing that J's friends are all 2-3 years old and J's first reaction to the playdough, I wanted to make sure whatever goo recipe we selected was non-toxic. There were quite a few out there with Borax and white glue, but this seems to be a consistent non-toxic recipe.

Non-Borax Goo Recipe:
2 parts corn starch
1 part water (varying reports of cool/warm water - we used warm, but not boiling)
As much food coloring as you want

For the amount shown in the pictures we used:
1 cup corn starch
1/2 cup water
5-6 drops blue food coloring

Recommendation:
Add food coloring to water, as it will be difficult to stir in if you wait until you have the right texture. We learned this the hard way.  You might need to mix the goo with your hands.

Hands-on science in progress!


Warning, this science fun is very messy.


Don't worry, it cleans up with some water - or even better, put down some plastic.

Storage:
Best if used right after you mix it, but you can store it in a plastic ziploc bag and massage it before you decide to use.  If it dries out, add a few drops of water and mix (best if you use your hands).

Warning:
This did dye our hands!!

Also note:
The corn starch + water has a very weird texture.  At first, it looks almost too liquidy and flows very nicely.  Touch it!  It seems like it has a high surface tension.

This video was taken after about 30 minutes of playing with the goo.  It definitely looks more liquidy when you first mix it.


J helped clean up too: