Monday, October 21, 2013

Melting Ice and Colors!

I've seen this activity a few places, but this ice and color lesson caught my attention on Pinterest last year.

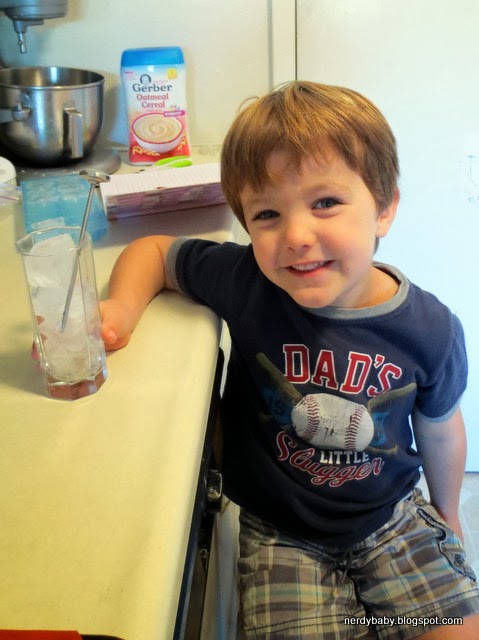
I thought I'd share our experience with melting ice and colors and how we conducted the experiment. J had a great time, and he really directed the lesson. I was happy with how it turned out!

We tried to fill the ice cube trays with primary colors (red, blue, yellow) food coloring and then added the water, and it was a disaster. I rinsed out and started over. We filled our ice cube tray 1/2 full of water (to give us a little wiggle room putting into the freezer) and then added the primary food coloring drops (4 drops per cube). We stirred each color with its own spoon (so we didn't cross contaminate colors before we even started our experiment).


We froze the ice and then placed them into clear custard bowls. We put two ice cubes in each dish, making sure each of the colors mixed (yellow/blue, red/blue, red/yellow). J predicted/hypothesized what was going to happen in terms of colors using little note cards in front of each dish, using markers for his predictions of colors.


I particularly like the yellow, which didn't show up in the wide shot above (see close-up below). I also liked the purple heart and the orange pumpkin.


Now, let me warn you that cheap food coloring is hard to wash off of hands. Both J and I were dyed for a day or two (surprisingly, the clothes remained unscathed):


We let the ice sit through naptime and brought out the paint brushes to see if his hypotheses were correct. He was spot on with his predictions:


Now, J was thinking like a true scientist, "What if..." He wanted to know what would happen if he mixed all of the colors. He tried dipping his brush into all the colors and then painting, but that would just end up the color of the last color he dipped in. Grandma suggested doing dots of each color and spreading them around:


It made brown! However, J wasn't super satisfied or convinced. He wanted to combine all the colors into one big bowl.


He painted with it, and he ended up at the same solution: brown (see brown line above the red line, below)


I loved making this experiment our own, how simple it was, and how excited J got about experimentation.

Sunday, October 13, 2013

Why I've been slacking


Time to announce why I've been feeling so bad for the last few months. I'm hoping to have some more energy soon. We're all excited.

Sunday, October 6, 2013

Melting Ice

Objectives:
*Measuring temperature
*Phases of water
*Hypothesis formation

Background:
J wanted to do science, and I have been a slacker the last few weeks/months. I wanted to see how well J did with reading a thermometer and making hypotheses (educated guesses), so I put together a melting ice science project on the fly. We even put it in J's Science Lab Notebook.

Methods and Materials:

Basically this project consists of  filling a clear glass full of ice and taking the temperature throughout the day as it melts.


Hypthesis formation:

I asked J, "What will happen to the ice?"
-He replied, "The ice will met to water."

I then asked, "How much water will be in the glass?"
-He stated, "To the top of the glass!"

Taking the measurements:

We set up the experiment and ran a few errands and took naps. I'm pretty sure we have a digital thermometer, but analog is more fun. J was able to tell what numbers the thermometer read (at least to the nearest 10).

10:35a: 20 deg F
11:00a: 30 deg F - ice is beginning to melt
1:00p: 32 deg F - ice is 1/2 way melted
3:00p: 60 deg F - ice is melted
5:45p: 70 deg F - water is now room temperature.


Note, the ice melted to water and the glass was half full (or half empty?). Volumetrically, ice takes up more space than water, which is why when you don't get free refills on your drink, you want less ice so you end up with more liquid.

J was pretty disappointed that he guessed wrong, but I told him that's ok. It's why we experiment, so we can learn more. Next time he'll know the answer. He was pretty excited for this impromptu science lesson.

Stay tuned for our colored ice cube experiment which we set up yesterday to do sometime soon.

Wednesday, September 25, 2013

M&M Math - Science Saturday

Sorry for the delay. I had a pretty wicked migraine last week that took me out most of the week.

To recap our September Science Saturday: we had a beautiful Saturday afternoon on the 14th and a great turnout of math lovers (my kind of people).

Now, I created this lesson from a second grade lesson that I only remember had to do with M&M and math (yes, 20+ years ago, when I was in 2nd grade). I wanted to bring it down to the preschool level: basic counting, addition, and I introduced the concept of division (sharing the M&Ms) just to see how well it went over.

Here's what I created as worksheets:
M&M Math Lesson for Preschoolers
M&M Bar Graph

I chose a paper cup full of M&Ms instead of a bag of M&Ms. I was pretty good at scooping out right around 40 M&Ms/cup. The parents guided the kids through the worksheets - surprisingly, the kids were patient enough to do the math before eating the M&Ms.

I had the kids count their M&Ms. The best method was to dump them all out and count them as you put the M&Ms back in the cup:


Then, the kids sorted their M&Ms by color and counted the amount in each color:


Then I had the kids add the primary colors (red, blue, yellow) and then the secondary colors (orange and green since there is no purple). This was exciting for most of the preschoolers since they knew what primary and secondary colors were.

The wild cards were the concept of division and the bar graph. I introduced division as sharing their M&Ms. If you split your M&Ms equally between everyone in your family, how many would each person get? I suggest getting a paper cup for each family member and putting M&Ms one at a time in everyone's cup until the M&Ms are gone. Then count the piles to make sure they are equal. If they aren't, how many are left?


For the bar graph, I made it optional since I wasn't sure of the attention span on the beautiful Saturday. Most kids wanted to do it. I recommend transcribing your color counts below the labels on the x-axis (the colors) and using the same color crayon as M&M to color how many M&Ms of that color you have. I told the kids to find the number on the graph (y-axis), draw a line at that number, and color from 0-the number of M&Ms in that color (I have the axis counting by 5's and put on a minor axis of 1's). The kids were then able to visually assess which color(s) had the most M&Ms.

I hope this is successful for you. We had a lot of fun! It's just in time for Halloween, so feel free to use packets of M&Ms instead of cups of M&Ms. Cups were pretty easy for the bulk necessary for Science Saturday (and most likely classrooms).

P.S. I was asked by parents of really young kids how kids learn how to count (like without skipping numbers or getting stuck in transitions between decades). My answer: practice. J had a hard time, and we just practiced. He can now count to over 100 before getting bored, without mistakes most of the time. Hopefully, you can find and state the patterns as you go along (like from 20-100 everything goes decade+next number ie. twenty-one, twenty-two...and 40-90 sounds just like their unit digit (four-ty, six-ty, etc. though fifty is hard since it's not five-ty)).

Related Posts:

Wednesday, September 11, 2013

Telling Time for Beginners

We picked up this Dr. Seuss foam clock from Target. It was something that J really wanted, and I was hoping we can learn a little more about time from an analog (non-digital) clock.


J has always been an early riser in the morning. We got a digital clock when he was around 18 months, so he can start recognizing numbers, in hopes that he would understand not making a peep until 7:00 am on Saturday mornings. It worked to an extent.

At 4, he can tell us what time the digital clock reads. He is able to say if his school is closed if it's after 6:00 pm. However, he still doesn't understand that the next numbers in minutes after 59 is 00.

So when we saw the clock at Target for $0.50, I figured whynot? It'll at least start the discussion about time.

Points we've discussed so far:
1. The hour hand is the little arrow. Wherever the little hand is first, that's the first number you say. On real analog clocks, the little hand moves slowly to the next number as the big hand ticks away the minutes. This is a little too advance for my 4 year old at this moment. If your kid is grumpy about the little hand not being exactly on 3 when it's 3:30, explain that you take the number you come across before the arrow when going around the clock (ie. if it's between 3 and 4, you get to 3 first when tracing the edge of the clock with your fingers, clockwise).


2. Each of the numbers represents 5. Starting at 1, we are learning to count by 5's around the clock. This is a really hard concept. I don't know how best to explain the numbers and that 1 really means 5 minutes and 2 really means 10 minutes, etc. If you have insight on helping pretty little kids understand minutes of the clock or counting by 5's, I'd appreciate any help.

Reception: J likes to learn about the clock. He'll bring it to me with a time that he sets and asks me to tell him what time it is. We'll work through the problem together, and he typically asks for another time problem. We have yet to get past two separate time telling problems at a time.

You can make your own clock with a paper plate, two arrows (print them out from Word or the internet), and a brad. If you make your own, you can decorate it however you and your child desires.

How have you introduced time telling in your family? Have you been successful?