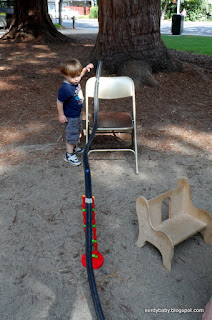
Fast forward to ~1 year ago, we went to J's Great Grandpa's house, and he was fascinated by an old marble track toy. Since he didn't try to eat the marbles, I figured he was old enough to play with marble roller coasters.
Materials (cost, ~$5 for 10 halved pieces of foam track):
*Foam pipe insulation (from hardware stores like OSH or Home Depot, ~$1/6ft piece, which will be cut in half to make two tracks)
*Masking tape
*Furniture, towers, anything you can use to prop your coaster up.
*Marbles
Take away lesson:
*Transfer of energy (this topic makes me giddy - yes, nerd). Total Energy = Potential Energy + Kinetic Energy (+losses due to things like friction, for the older kids)
---When something is sitting high, it has stored energy called Potential Energy (I like to think that it'll potentially fall). If it's at rest at a height, kinetic energy in the equation above starts at 0 and all of the energy is potential. Once it's set into motion it begins to have Kinetic Energy (kinetic is a fancy term for motion). A falling object has a combination of potential and kinetic until the object reaches the ground/a place where it won't fall any more and it's all kinetic energy (potential = 0 in the equation above).
How do build your coasters:
- Start up high. Why? Because the higher you start, the more energy you'll have to play with.
- This also could get tricky as you might have too much energy and will have to switch your design to account for that too.
- I like to tape my roller coaster to a chair or a wall.
- Play with the drop angle, give your roller coasters bumps, twist and turns, and loops. Use other furniture/blocks to support the track (see pic below). We use a lot of stools, chairs, side tables, wall space, blocks.
- Tape a paper cup to the end of your track to catch the marble.
Trouble shooting:
- My marble flies off of the track
- Adjust your track to go where the marble wants to go.
- Add a bump or a bank (twist/turn) to get the marble to slow down.
- Start the marble at a lower height.
- My marble falls off of during the loop
- Situation 1: you don't have enough energy to clear the loop. Start the marble higher or shorten the height of the loop.
- Situation 2: the loop is too tight and the marble has too much energy to go where you want it to go. Adjust the loop height (taller) or width (separate the loop ends slightly so the track isn't touching on the bottom of the loop).
Other fun thing to try (special thanks to N, age 4 - not pictured, who found this out while playing at the park):
- Line up 3-4 marbles at the end of the track and watch what happens as another marble you release on the track bumps into the 3-4 marbles at the end of the track.
Feel free to share your pics of hours of roller coaster fun with me.


No comments:
Post a Comment