Friday, January 6, 2012

Toilet Paper Tube Sail Cars

My previous post on sail cars made it onto Pinterest (edited: I'm now on Pinterest!).  I feel so crafty though it was such a clunky car.  It was a really simple car to make on the fly and could be made out of things lying around the house (ie. a contact sol'n box).  It can also occupy kids' attention for some time.

I've been debating about my next lesson with the preschoolers at J's school.  I really want to do sail cars, but I'd have to make 12-15 of them (and make them look identical so we don't have 15 grumpy 2-3 yr olds).  The little voice in my head kept saying cafeteria milk cartons, but they aren't easy to come by if you don't have older kids in school.  I thought about it some more and played with what we had lying around the house.  Enter in my new sail car made from recycled materials that are plentiful: toilet paper tubes and empty tissue boxes.


I actually think this one works much better than the quick sail car I threw together in October.

Materials:
Toilet paper tube (or paper towel tube cut in 1/2 or 1/3)
Empty tissue box
Wooden dowel (I use skewer sticks with the tips cut off)
Popsicle stick (preferably a clean craft stick)
Scissors
Masking tape

Methods:
-Trace a circular object onto the tissue box cardboard (4 times) for the wheels***
-Cut out the 4 wheels
-Cut the two dowels 1/2 to 1 inch more than the diameter of the paper tube.
-Attach one wheel to each dowel (I press fit then masking tape it in place to the dowel) - make sure the wheels are straight.
-Single hole punch 4 holes for the axles - 2 in the front and 2 in the back (make the holes relatively straight across from each other and the front in line with the back holes).
-Insert wooden dowels in the holes and attach the other wheels (masking taping the wheels to the dowels if you so choose).

*Now you should have a car you can push around (even blow on the front of the tube to get it to move).  Test it to make sure your wheels are straight and the tube isn't touching the wheels.  You can also build a small cardboard ramp to let gravity drive the car.

Methods (cont):
-Cut out a sail shape from the tissue box.
-Attach sail to a popsicle stick via masking tape (tape front and back of sail to the popsicle stick).
-Carefully puncture the top of the tube with one pointy side of an opened pair of scissors.  I prefer the puncture to be perpendicular (90 deg) to the length. With only the top of the tube punctured, the sail won't be dragging on the floor slowing the car down.
-This new puncture should be just the right size to insert a popsicle stick.
-Reinforce mast with masking tape.

*Now blow on the sail and watch the car effortless glide across smooth surfaces (it still doesn't work well on carpet).


More fun activities with sail cars:
  • Put your car on a long coffee table.  Can you give it enough power to drive over the edge?
  • Navigate an obstacle course.
  • Have a friend stand on the opposite side of the table.  Blow on opposite sides of the sail.  Watch the car go back and forth between you two.  Have a competition on who can get the car to fall off first.

***I used a compass this time around for wheel drawing, which was nice since I had a pin prick where the center of the circle was.  In turn, my wheels seem to turn better this time time than last when I think I used playdough containers as my circle guide.  Yay for being a little bit of a hoarder when it comes to old math tools.  I don't think I've used it since high school.

Related Posts:

Tuesday, January 3, 2012

Colors + Light follow-up

Here's a fun website to learn more about colors and lights: The Physics Classroom.

Mixing light is different than paint.  For example red + green = yellow (instead of brownish) and blue + red =  magenta (instead of purple)

White = all primary light colors (R+G+B)

vs.

Black = all primary paint colors (R+B+Y)

Mixing light is additive where as mixing paint is subtractive.

Experiment!
Mix different colors of paint
Shine/mix similar colors of light
Compare and contrast

Alternate equipment:
Instead of flashlights, we also have small LED lights of red, blue, and green.  This seems to be less of a hassle than taping cellophane to flashlights.  Big J bought them a few years ago for a Cub Scout activity about photography and light.  Just remember not to stare into LED lights.

Monday, January 2, 2012

Flashlight colors

Woohoo!  Happy New Year!!

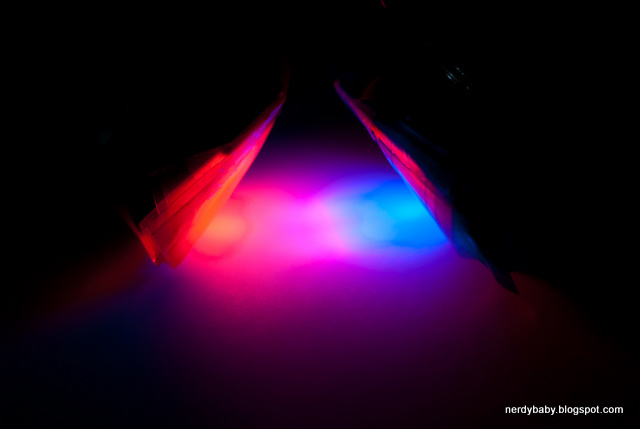
Today we taped some cellophane to flashlights and mixed colors.  Yay, visible light!


Tips and tricks:

  • Use lots of cellophane - if you think you need more, you probably do (for example, the blue flashlight pictured above needs more cellophane).
  • So we didn't have 3 rolls of cellophane in our small living space, we purchased red and yellow cellophane bags for 99 cents (and have lots left over) - a blue bag wasn't available in bag form at our local craft store, so we bought a roll of blue.
  • Scotch tape works just fine to hold the cellophane to the flashlights.
  • It works best if the two flashlights are the same type and size (see yellow and red above).  We ended up switching the flashlight for the blue/red pictures below.
  • Shine the lights on a piece of white paper.
  • Shine the lights on non-white surfaces - which works better?
  • Turn down the surrounding lights.

It's actually really hard to take a picture of the mixing light, so here's the best we could do.

Red and Yellow = Orange


Red and Blue = Purple-ish (magenta)


Blue and Yellow didn't make a good picture, sorry.

Saturday, December 31, 2011

Celebration Helicopters

No, I won't be staying up till midnight tonight, and J's already down.  It's 8:30p on NYE; I'm such a mean mommy.  He has no clue that much of the world stays up really late and throws fun stuff in the air at midnight tonight.

Well, we made these fun paper helicopters to throw up in the air today.  Yay, science!


Earlier in the month, we played with helicopter leaves.  If you are desert dwellers (like me) and you want to play with helicopter-like science, you can purchase helicopter seeds or you can make your own spinning helicopter out of scrap paper.

Our helicopter was ~6x2 inches and started as a rectangle.

Directions:

  • Cut the paper in half about 2.5 inches down on the long side (please use your best judgement when letting your child use scissors).
  • Leave half an inch.
  • Make one slit on each side coming in ~1/3 of the way of the paper.
  • Fold the bottom half (where you just made the two slits) into thirds.
  • At the bottom, fold about 1/2 inch up and attach a paper clip.
  • Fold the blades of the helicopter in opposite directions.
  • Toss up in the air and watch the helicopter whirl down to the ground.
  • Shout HAPPY NEW YEAR!  (or whatever you want to celebrate).


Things to experiment with:

  • Attach different paper clips and note how the helicopter reacts.
  • Make different sized helicopters and note how the helicopter reacts.
    • What if the blades were longer/shorter?
    • What if the paper was wider than 2 inches?
  • Drop it from different heights.
  • Drop it upside down and note how it reacts.
  • Make helicopters out of different types of paper: computer, construction, newspaper, cardstock, tissue paper, etc., and note how each react.  Which one(s) make the best helicopter?
I might edit this post at a later time to add the video of J playing helicopter, but for now, I'm going to enjoy my NYE hot fudge sundae and relax with a movie.

Hope you had a safe New Year's!  I look forward to blogging about more science in 2012!

Thursday, December 29, 2011

Too much ice cream


Every once in a while, the hubs and I get to escape.  We went to Fentons, the ice cream parlor highlighted in one of our favorite movies, Up!  Their special was a cookie sundae with chocolate and vanilla ice cream.  Proceeds went to donate school supplies to poor kids, so how could we refuse?  Big J didn't want to share (actually, it was the chocolate ice cream and cold fudge that I didn't want, so I chose an alternate ice cream with hot fudge - that I couldn't finish).

Big J spent a good portion of the date calculating how much ice cream he was eating/ate (see before pic above).  I think he estimated a liter of ice cream through measuring approximate diameter of the ice cream scoops with his fingertips.  He was very determined to finish it.  No wonder he got the chills afterward.