
We had a great turn out for our Science Saturday this month! We had it in a park with great sidewalks and access to sand (for weight), but unfortunately, we only one table to assemble things. It was crowded, but we sure had some fun. The goal was to learn about equal and opposite reactions, friction, and general engineering (tweaking your designs for better performance).
How to make your own recyclable racer:

1. Pick out a recyclable you think will make a great race car. I'm always fond of soda bottles. Water bottles nowadays are made with less plastic and are too squishy. I also wouldn't recommend aluminum cans since they are squishy and super light.
 |
| Tape standard straws to the bottom of the recyclable Weigh down the car with washers or sand if necessary |
2. Attach two pieces of a normal size drinking straw (small pieces are fine, think cut into 4ths or more) to the underside of your recyclable. This will hold your axles for the wheels, allowing them to move without friction. Note, in previous versions of balloon racers, I used an awl and pre-punched holes into the bottles. Using straws gives you a lot more freedom with adjustments (I hardly ever punch straight holes) and is safer all around (luckily, no battle wounds from before). You want the straw pieces to be parallel to each other and as straight as possible (perpendicular to the direction you'd like the car to move).
3. Stick your axles through the straws. We used stirrer straws for the little recyclables and kabob sticks for the bigger ones. I'd recommend chopping off the points of the skewers before giving to a small child.
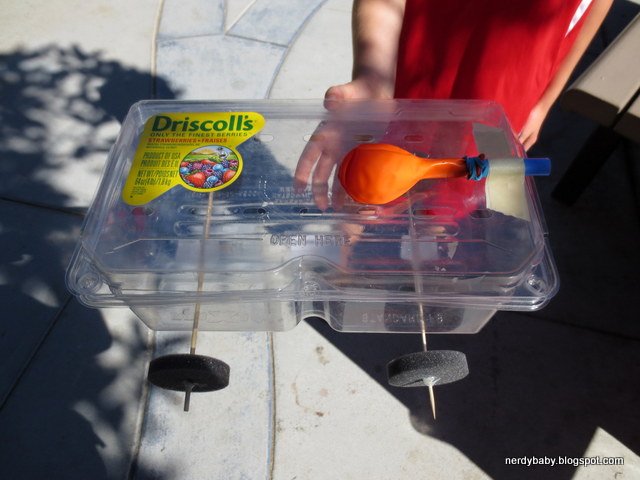
4. For wheels, we pre-drilled holes into bottle caps, I made some circular corrugated cardboard wheels using a compass-like tool for cutting circles (affiliate link), and I bought some foam discs. Nobody chose the cardboard wheels. It was split pretty 50/50 on foam and bottle cap wheels.
5. Attach your wheels to the axles. I recommend that the wheels not touch the recyclable since friction will slow down your race car. At this point, you can glue them into place with a hot/warmish glue gun. Whether you use a press fit or you glue the wheels, the wheels should spin with your axle. Make sure the wheels are straight or your car might veer.
6. Attach a balloon to a straw with a rubber band. I found the bubble tea straws (affiliate link) work really well (we cut them into 3rds to reduce costs - though I linked to Amazon, I found these at our local BB&Beyond for $2). You can use a standard straw, but you have to walk the fine line between the rubber band being too tight and crushing the straw or not being tight enough and you can't blow up the balloon.
7. Tape the balloon to the car. I recommend a place where it can hang off the back and you don't have to keep taking it off and on to blow it up.
8. Blow up your balloon and pinch tight, or put your finger over the straw to block the air. Set your car down and let go of the balloon.
9. If your car flips, consider weighing it down (washers or sand do a great job). You can also switch what direction of your car is front (ie. flip the balloon around so it points from the opposite end of the racer).
10. Make adjustments and see if your car can go even faster!
I was able to pull out my camera for video of a few racers we had in the middle of the activity. Parents had to help the little ones blow up the balloons, but fun was had by all:
Related Posts:
Where did you buy your foam disks?
ReplyDeleteI bought them from RAFT, a Bay Area local teaching resource. Try a craft store or us cardboard circles/disks.
DeleteThese are very cool!
ReplyDeleteThanks! We had so much fun with these racers. Hope you can join us soon :-)
Delete